Two years ago I wrote a blog post on Sand Casting Medallions. For that project, I already had a master for the medallions that I wanted to cast.
This year, I wanted to cast another dozen medallions for the Kingdom (for a different award) but I had no master. So I thought it might be helpful to document the process of making one. Please note that this process is for sculpting a clay master. There are other ways to make masters, but this is the one I learned.
Here are some of the materials you will need:
Sculpey brand oven-bake clay (other brands, such as FIMO, work just as well but Sculpey is readily available at almost any store with a craft section)
Another medallion with the desired thickness for comparison
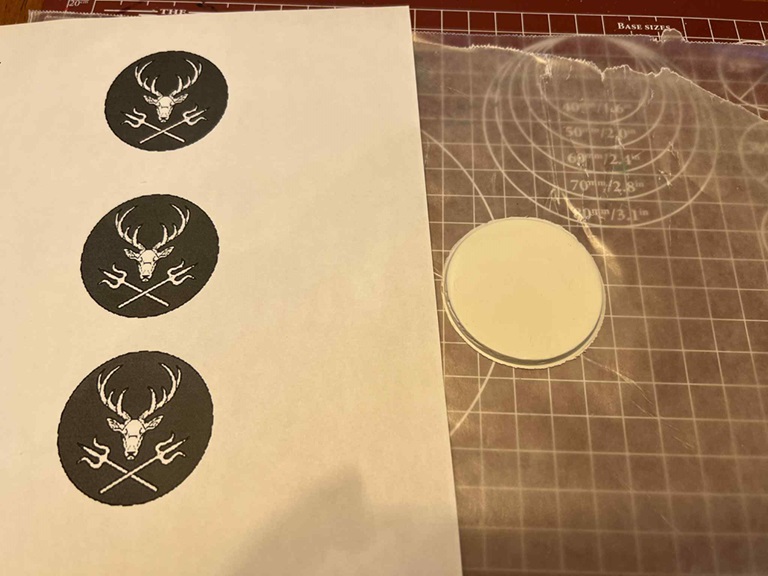
You can also use this same medallion to outline a circle in your clay. In this case, we actually used the black circle pictured above – it’s a 50mm Warhammer 40k base that served as a cookie cutter for the clay. If you don’t know what 40k is, you’re welcome.
It’s important to remember that the clay master you create must be able to fit inside of your ring molds, so keep those nearby for comparison. I used a 50mm medallion inside a 60mm ring mold, which gave me enough wiggle room inside the mold.
I’d also recommend tools for sculpting clay. There is a 52 piece set available on Amazon here. For this project I used a tiny blade and a dotting tool.
Once you have your materials, break off a chunk of the clay. I started with a piece that I rolled into roughly the size of a ping-pong ball. Once you’ve rolled your clay into a ball, set it on a non-stick surface like wax paper. Then, use a rolling pin (or any other tool with a long, tube-like handle) to roll your clay flat, trying to create as even of a surface as possible.
Once you’ve rolled the clay to your desired thickness, use your circular or cookie cutter type object to form your medallion and remove the excess clay from around the edges.
You can see the clay circle that I created in the picture below on the right. Now is when you can compare the thickness of your clay to your other medallion. I got lucky and managed to roll my clay to the exact thickness that I wanted on the first try!
For this design, I printed off a number of different sized images so I could best match the size to my piece of clay. Once I matched the size of the image to the clay, I cut it out. I then cut out the design itself, so it looked like this:
I cut out the stag’s head and the tridents.
This will serve as a pattern for the medallion’s design. The next step is to carve out the design from the clay.
Here is the clay medallion after I carved out the design.
I want to note here that again, this is just one way to transfer a pattern to clay. One other method is to trace your design or pattern onto a second piece of flattened clay and then lay it over your medallion shaped clay.
Here is what that looks like:
This clay master was made by my husband.
Both methods work, it really just depends on the style or look you want.
Once you’ve finished carving your clay, you need to bake it according to the package instructions until it hardens. This baked piece of clay will then serve as a rough first draft of your master. Then just follow the usual steps for sand casting, using the clay medallion first.
Here is the first pewter medallion cast from the clay master.
Here, the edges have been trimmed.
Once you have that first pewter medallion, you will want to clean up the design so it can serve as your permanent master moving forward. To clean up the medallion, trim the edges with metal snips, files, and a jeweler’s saw to create a smooth outline. For the recessed portions, carve out the design to have a bit more depth with a rotary tool, hand engraver, or files. This part is extremely important and will make for cleaner casts.
A quick side note, clean up is my least favorite part of casting so I usually ask my husband to do that for me. I’m very fortunate to live with someone who has their Laurel in metal working and is willing to teach me casting.
Final product – note that my husband sanded it fairly smooth, which will allow for easier releases from the mold in the future.
Now you can use your pewter master to cast as many medallions as you need!
In May 2024 my husband asked me if I could paint a prize box for our friend, Lord Aleksandr Tomasovic, who was fighting his prize fight to advance to rank of Free Scholar within the Academie d’Espee of Atlantia. This is the second box I’ve painted for this purpose.
This time, I chose to paint the box in a style that would match the recipient’s persona. In this case, Aleksandr has a Rus persona, so I chose a style with Russian origins – Mezen wood painting.
I’ll also admit to being a bit selfish here – I really love the look of Mezen folkart. Before I started this project I knew that finding documentation to support it’s existence pre-17th century would be challenging, but I went with this style anyway.
I did eventually find research dating the carving of nature and animal motifs in the Mezen region to the 12th century in Folklore and Folk Art of Russians of the European North (Dmitrieva, 1988, pg 114). The same book also describes how it was common for homes, especially on doors, doorframes, and window frames to be painted with similar symbolism, with historic examples from the 1800s. Based on this information, I find it plausible to extrapolate that this style of wood painting is older than the year 1600, but I was unable to find any documentation of early examples.
This lack of documentation could be for a number of reasons. One of which is that this style of painting was typically used to decorate domestic items of the non-ruling class. These items were typically not a priority for preservation or study. Another reason could be that this painting style was exclusively used on wooden mediums, which also makes pre-17th century preservation a challenge, especially in harsh climates and areas prone to fire. Lastly, we know that Socialist Realism became the only state-sanctioned art style for 60 years (starting in 1932), which led to the destruction of both religious and folk art styles across the Soviet Union (Rohotchenko, et al., 2022).
I also think it’s important to note that while we may not have any evidence of this painting style in period, the symbology used almost certainly goes back to ancient history. A notable example of this type of symbolism can be found in the reindeer depicted in the White Sea Petroglyphs. These petroglyphic reindeer share many stylistic features with the much later Mezen paintings and depict similar scenes.
For anyone interested in the symbology used in Mezen art, this is an interesting site to visit, though it is in Russian so it will need to be translated, but does include additional sources.
A series of barrels painted in the Mezen style. Source.
I didn’t take many progress pictures for this project, but the process was the same as the one used for this box.
In short:
Sand the box smooth.
Coat the entire box with gesso (serves as a basecoat).
Depending on how bright you want the colors, coat the entire box with white acrylic after the gesso has dried.
Go to town with your design!
When finished, use a spray lacquer to protect the paint.
I painted weasels on the front of the box to represent Aleksandr’s heraldry.
The (derpy) cat represents his wife, Signy’s, heraldry.
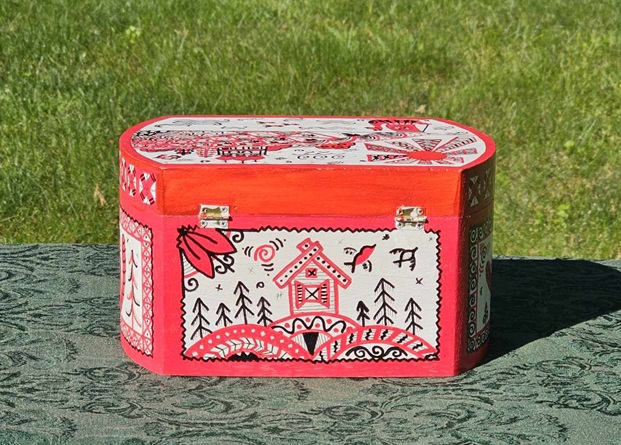
The back of the box.
The bird represents Aleksandr’s son. I asked Signy what animals their son likes and this was one of the options.
The top of the box.
The inside of the box was left plain. The sticker was added by my husband.
Because of the intricacy of this particular style of painting, I used a combination of regular acrylic paint and brushes, acrylic paint pens in various thicknesses, and sharpies.
Overall, I’m quite happy with how this project turned out. It was a fun way to try out a new art style and get a little creative!
References Rohotchenko, et al. (2022). Socialist Realism: An Instrument of Class Struggle in Ukrainian Fine Arts and Architecture. https://philpapers.org/rec/ROHSRA-2
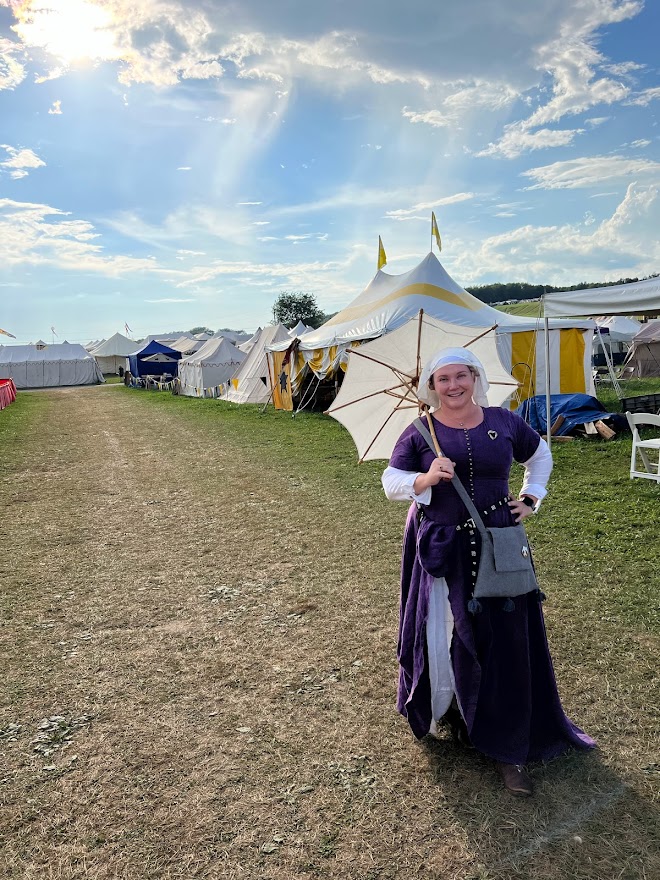
I’m back to writing my tradition “top ten” moments of Pennsic! I try to write my thoughts and feelings down within a day or two of being home, that way the memories are fresh and I can look back and reminisce later. This practice has really helped keep my love for the SCA and Pennsic War going over the years, especially during the plague times! So, in no particular order…
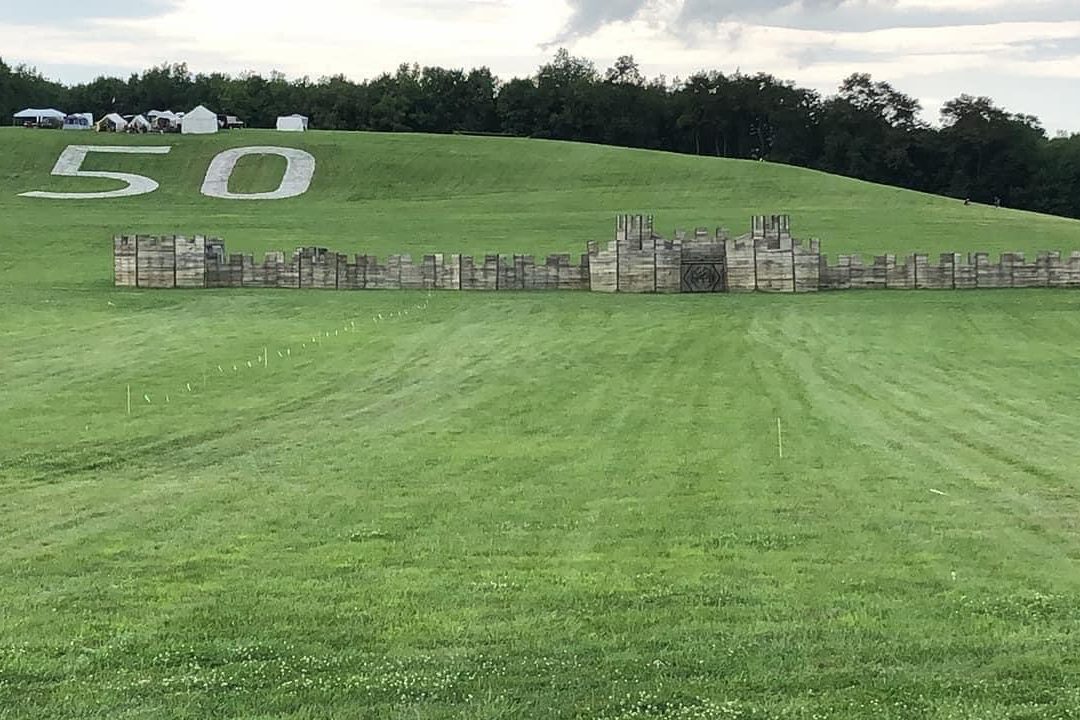
The castle/fort at Pennsic with the year 50 painted in the grass.
Running Grimmsfield camp. This was the second year that my husband (now Master Cataldo Querini) and I have assumed responsibility of camp, but my first year as an official Land Agent. While I learned a lot about the Land Agent process and feel prepared if we end up in charge again next year, the real joy of running a camp is bringing folks together and having a great time. We had 18 people (from four different Kingdoms!) in camp during Middle Weekend, which was the most populated time, and I truly enjoyed the comraderie of our camp mates. I am very fortunate and grateful to be surrounded by good, fun-loving folks who ensure that my two week vacation is an absolute blast! We were even graced by the presence of Master Grimm, himself, aka Darren!
Running Newcomers Point and the Newcomers Track of Classes for the last year. I’ve been running Newcomers Activities at Pennsic since 2019 and while it’s been absolutely wonderful, it is time for me to move on! This year we worked extra hard for Pennsic 50 and were open every day from 10am-6pm. In addition to sitting at Point nearly every day for at least an hour, I also taught six hours worth of Newcomers classes. I’ve met some awesome people over the years doing this job, but I can’t lie – it will be nice to take a break!
Sitting at Newcomers Point the first Sunday of War!
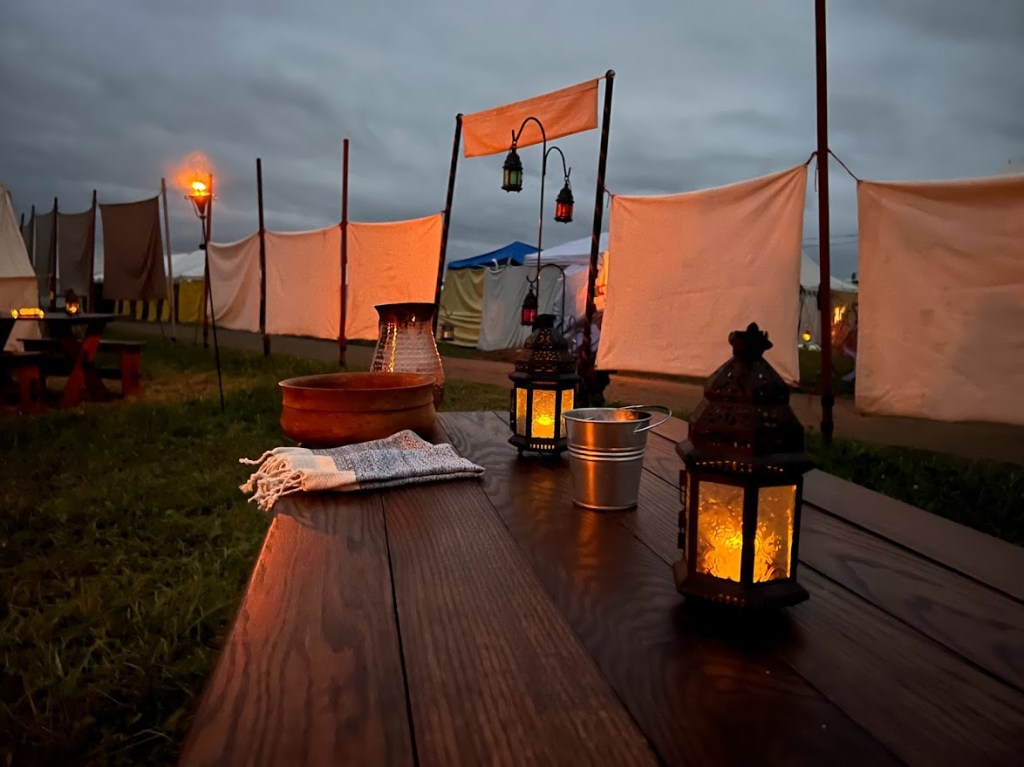
Watch shifts! This year I did two watch shifts, one with my friend Lady Celestria from 10pm-1am, and the other with my husband from 5-8am. I love doing watch shifts at night/early morning. For me, it is when Pennsic is at its most “magical”: torches and candlelight, smelling woodsmoke from camp fires, the sound of drums, and watching the sun rise.
You definitely need blankets, gloves, and a hood or hat if you do a night time/early morning Watch shift! It gets cold on that golf cart!
Watching the sun rise over Pennsic from Mount Eislinn.
Atlantian Fortnite. This year I was honored to assist with three vigils on Sunday of Middle Weekend. My husband was recognized for the Order of the Laurel, my (former) Peer Duchess Adelhait for the Order of the Pelican, and my friend Master Bumi for the Order of the Chivalry. Our friends and campmates were a huge help in assisting with set up and tear down/providing food and drink. While the weather tried to derail our plans, once the skies cleared it turned into a beautiful evening. Again, I’m very grateful for the people in my (and my husband’s life) who were able to make this happen with their hard work and effort!
My husband and I at the fort on the night of his vigil.
The Roman Bacchanal! Honestly this always makes my top ten because it is A SPECTACLE. The Courtesan’s Guild did an amazing job running this party, as they do every year, and I love to see the improvements/additions that are made each time. My only regret is that we didn’t get a photo of the eight of us (from our camp) that attended because we truly looked amazing that night!
Nights around the campfire. This year we spent a lot of time at night around the fire or under the dayshade (if it was raining) and were fortunate to have some wonderful bards entertain us. One of our newest campmates, Lady Signy, has an absolutely amazing voice and I am so glad that she shared her talents with us this year!
My husband and camp mates around the fire.
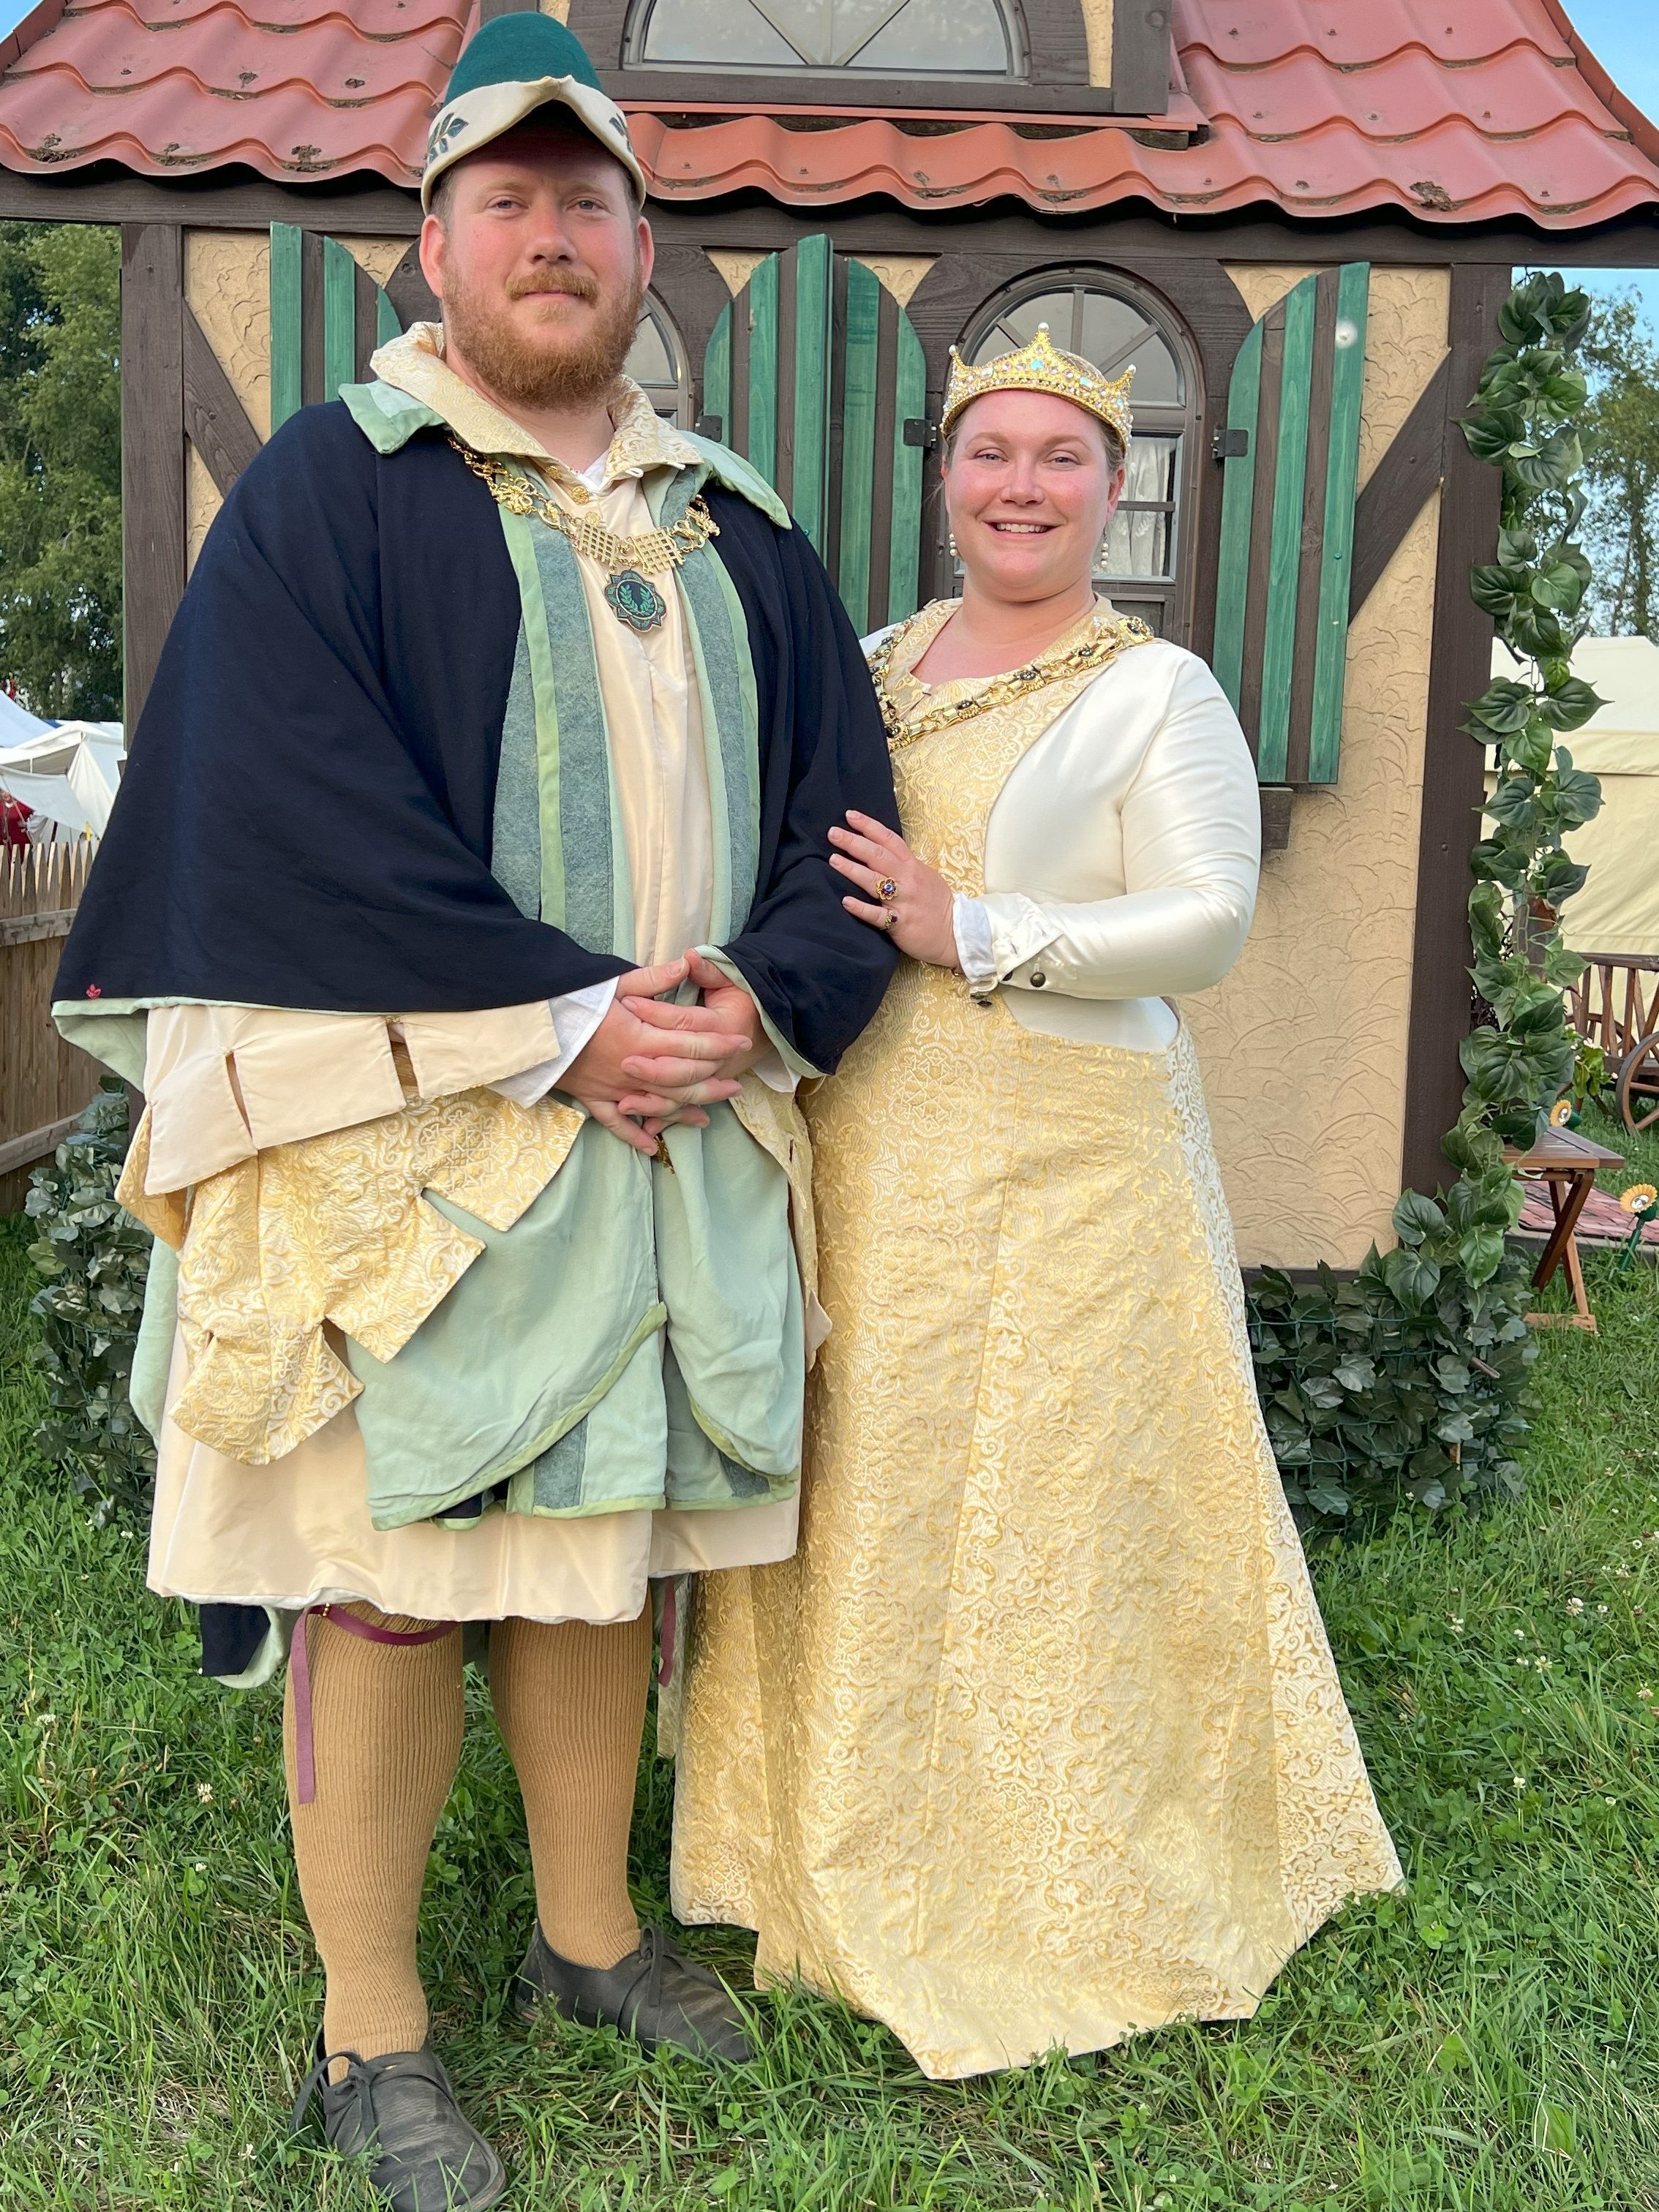
Atlantian Court. While the vigil for my husband and friends was Sunday of Middle Weekend, their elevations took place on Wednesday at Atlantian Court. I have to say that our camp and household(s) all looked amazing! We really dressed up and looked absolutely fabulous. Again, I feel so lucky to be surrounded by such a great group of people!
My husband and I after Court.
My Peer, Duchess Adelhait, and I after Court.
The Return of Octobar. I was very happy that my favorite bar at Pennsic was back this year! A big group of our campmates all went out on Thursday of Peace Week and had a great time. Next year we will have to go out more than once!
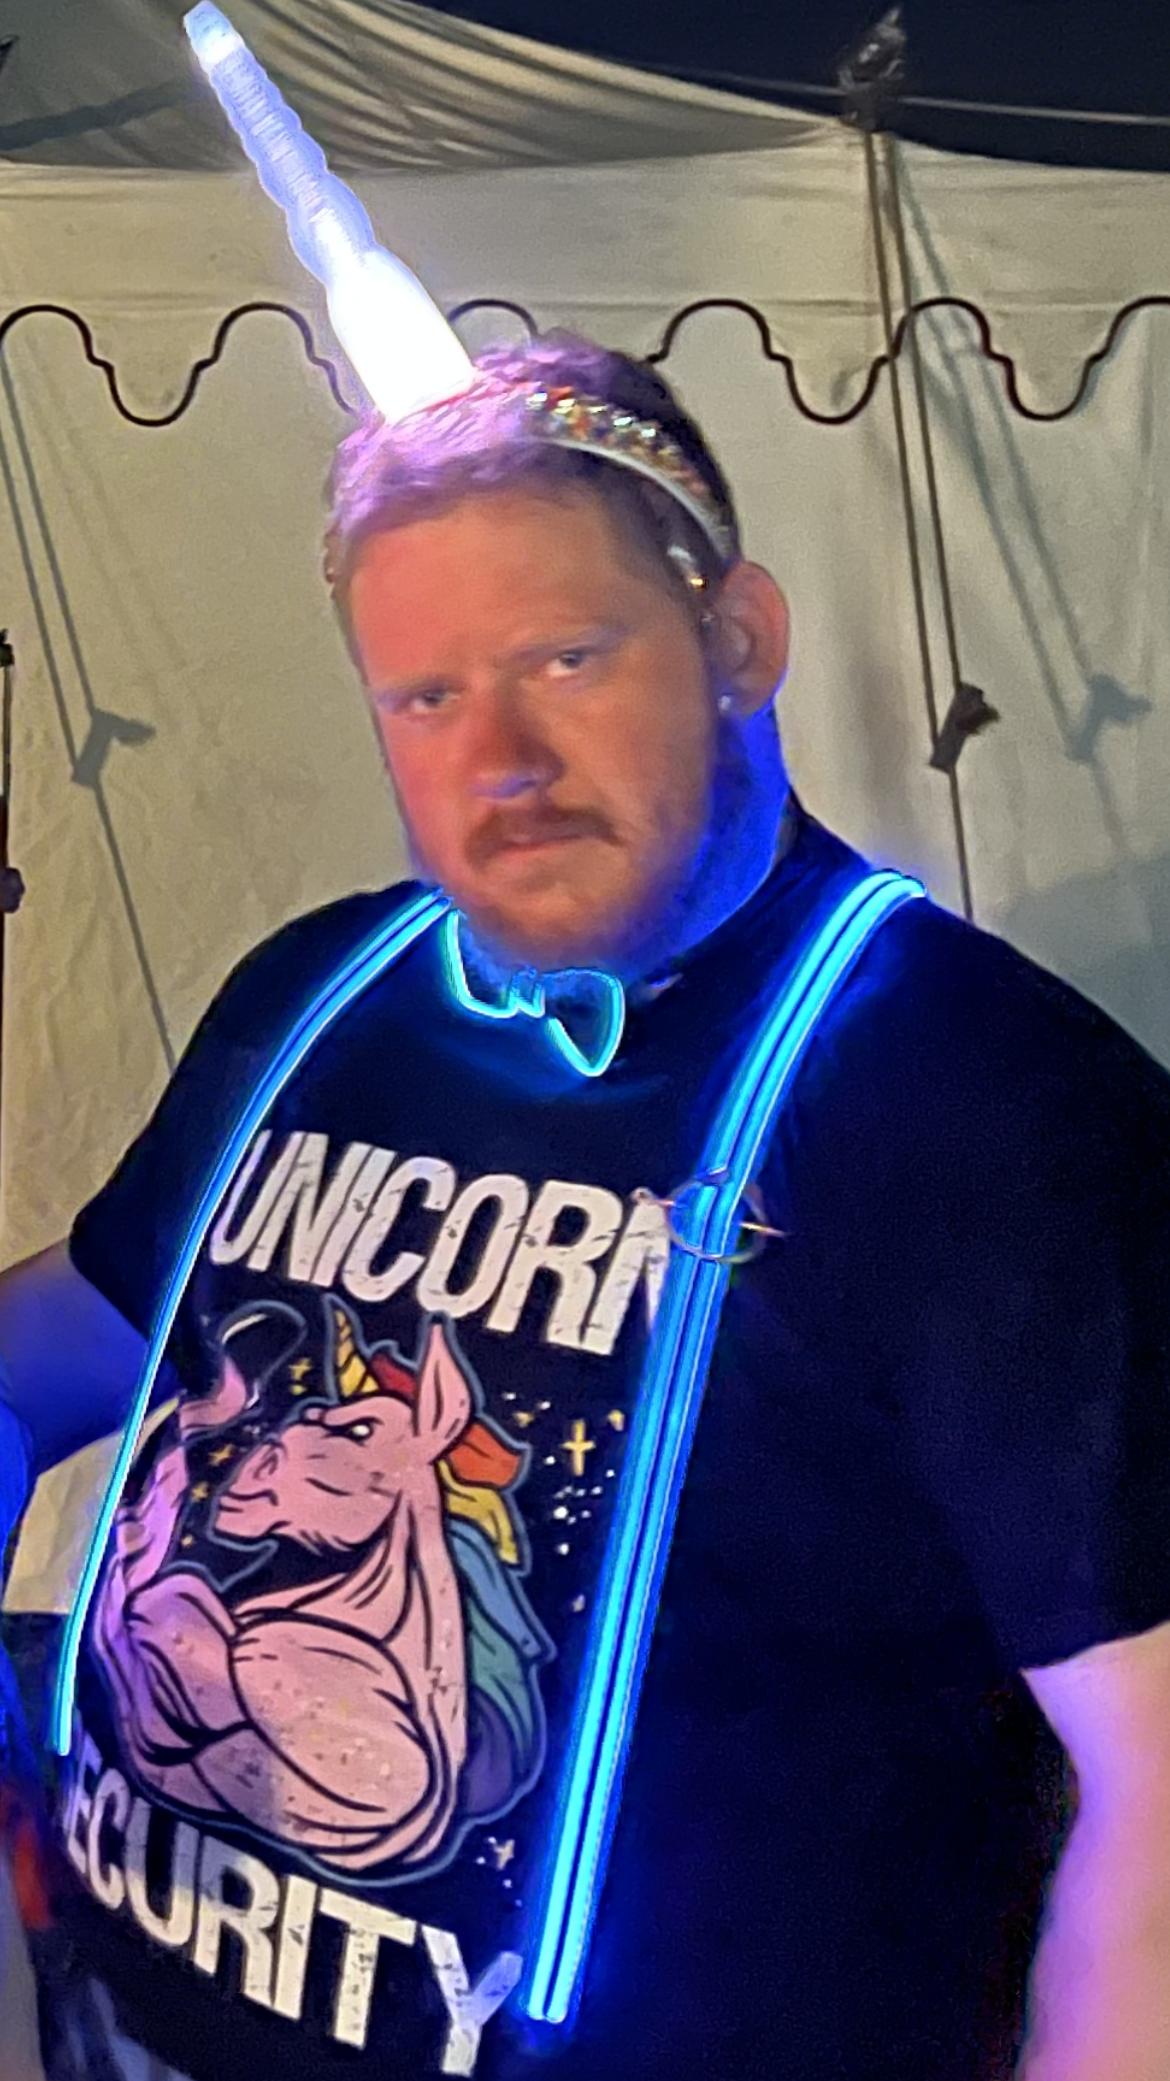
Duchess Shenanigans. Last year was the beginning of a new tradition, started by Duchess Mary Grace and Duchess Adelhait, of dressing up and wandering Pennsic at night causing a Ruckus™. This year the theme was “Unicorn Party” and the game was “Duchesses Make a Deal”. If you happened to see a wandering herd of blinking unicorns on Tuesday of War Week, that was us! Hopefully you enjoyed the entertainment!
Yup. This is my husband looking ridiculous.
Shopping! The shopping at Pennsic is truly the best of any SCA event in the Knowne World. I was very excited to see some new merchants there this year and as a result, I spent a fair amount of money on garb and accessories. I also got to pick out some nice gifts for friends, which I very much enjoyed. I do love being a gift giver!
Overall, Pennsic 50 was a great time! I tried very hard to balance activity with rest this year, especially considering some ongoing health issues and fatigue that I’ve been experiencing. As a result, I did not participate in as many activities as I usually do. But I am hopeful that next year will be a bit more active and I can return to doing a lot of the fun things that I enjoy, like archery and waterbearing! Only 347 days until next time!
For the Dirty Dozen Largesse competition for King’s Assessment I’ve decided to try my hand at sand casting pewter. Luckily for me, my husband, Baron Cataldo Querini, has been casting for years and was able to provide all of the tools, material, and knowledge that I would need in order to try this -new to me- art.
The parameters of the competition stated that all entries would be donated to the Kingdom. With this in mind, I reached out to Mistress Asta Knarrarbringa, Their Majesties of Atlantia’s Royal Secretary, to ask if there were any award medallions needed. She let me know that they were running low on Golden Dolphin medallions and so I decided that making a dozen for donation would be helpful.
The first step of sand casting is to design a master. The master will then be used for each cast to create the product; the product in this case being twelve Golden Dolphin medallions. Originally, my husband and I started working on a design to 3D print and use as the master. But then I remembered that I already had a Golden Dolphin medallion cast in brass that we could use. Using a pre-existing medallion saved us a lot of time!
My Golden Dolphin medallion that we used as a master.
This Golden Dolphin medallion is a lineage medallion that was originally purchased for Baron Christophe of Grey, then passed to Mistress Lorelei Greenleafe, then passed to Master Stephan Grimm, and then passed to myself. It does include a maker’s mark on the back – a petaled flower – but, despite searching, I could not find the original maker (if someone knows, please tell me so that I can give appropriate credit!). Regardless, I thought that using this medallion as a master would be a way to honor those who have held it in their possession before it came to me.
After deciding on the above, I set to work casting the medallions. The first thing I did was to light the burner to start the process of melting the pewter. Pewter melts at around 338° F depending on the mixture of metals within the pewter, which is a combination of tin and other metals.
Chunks of pewter melting in a steel camp cup.
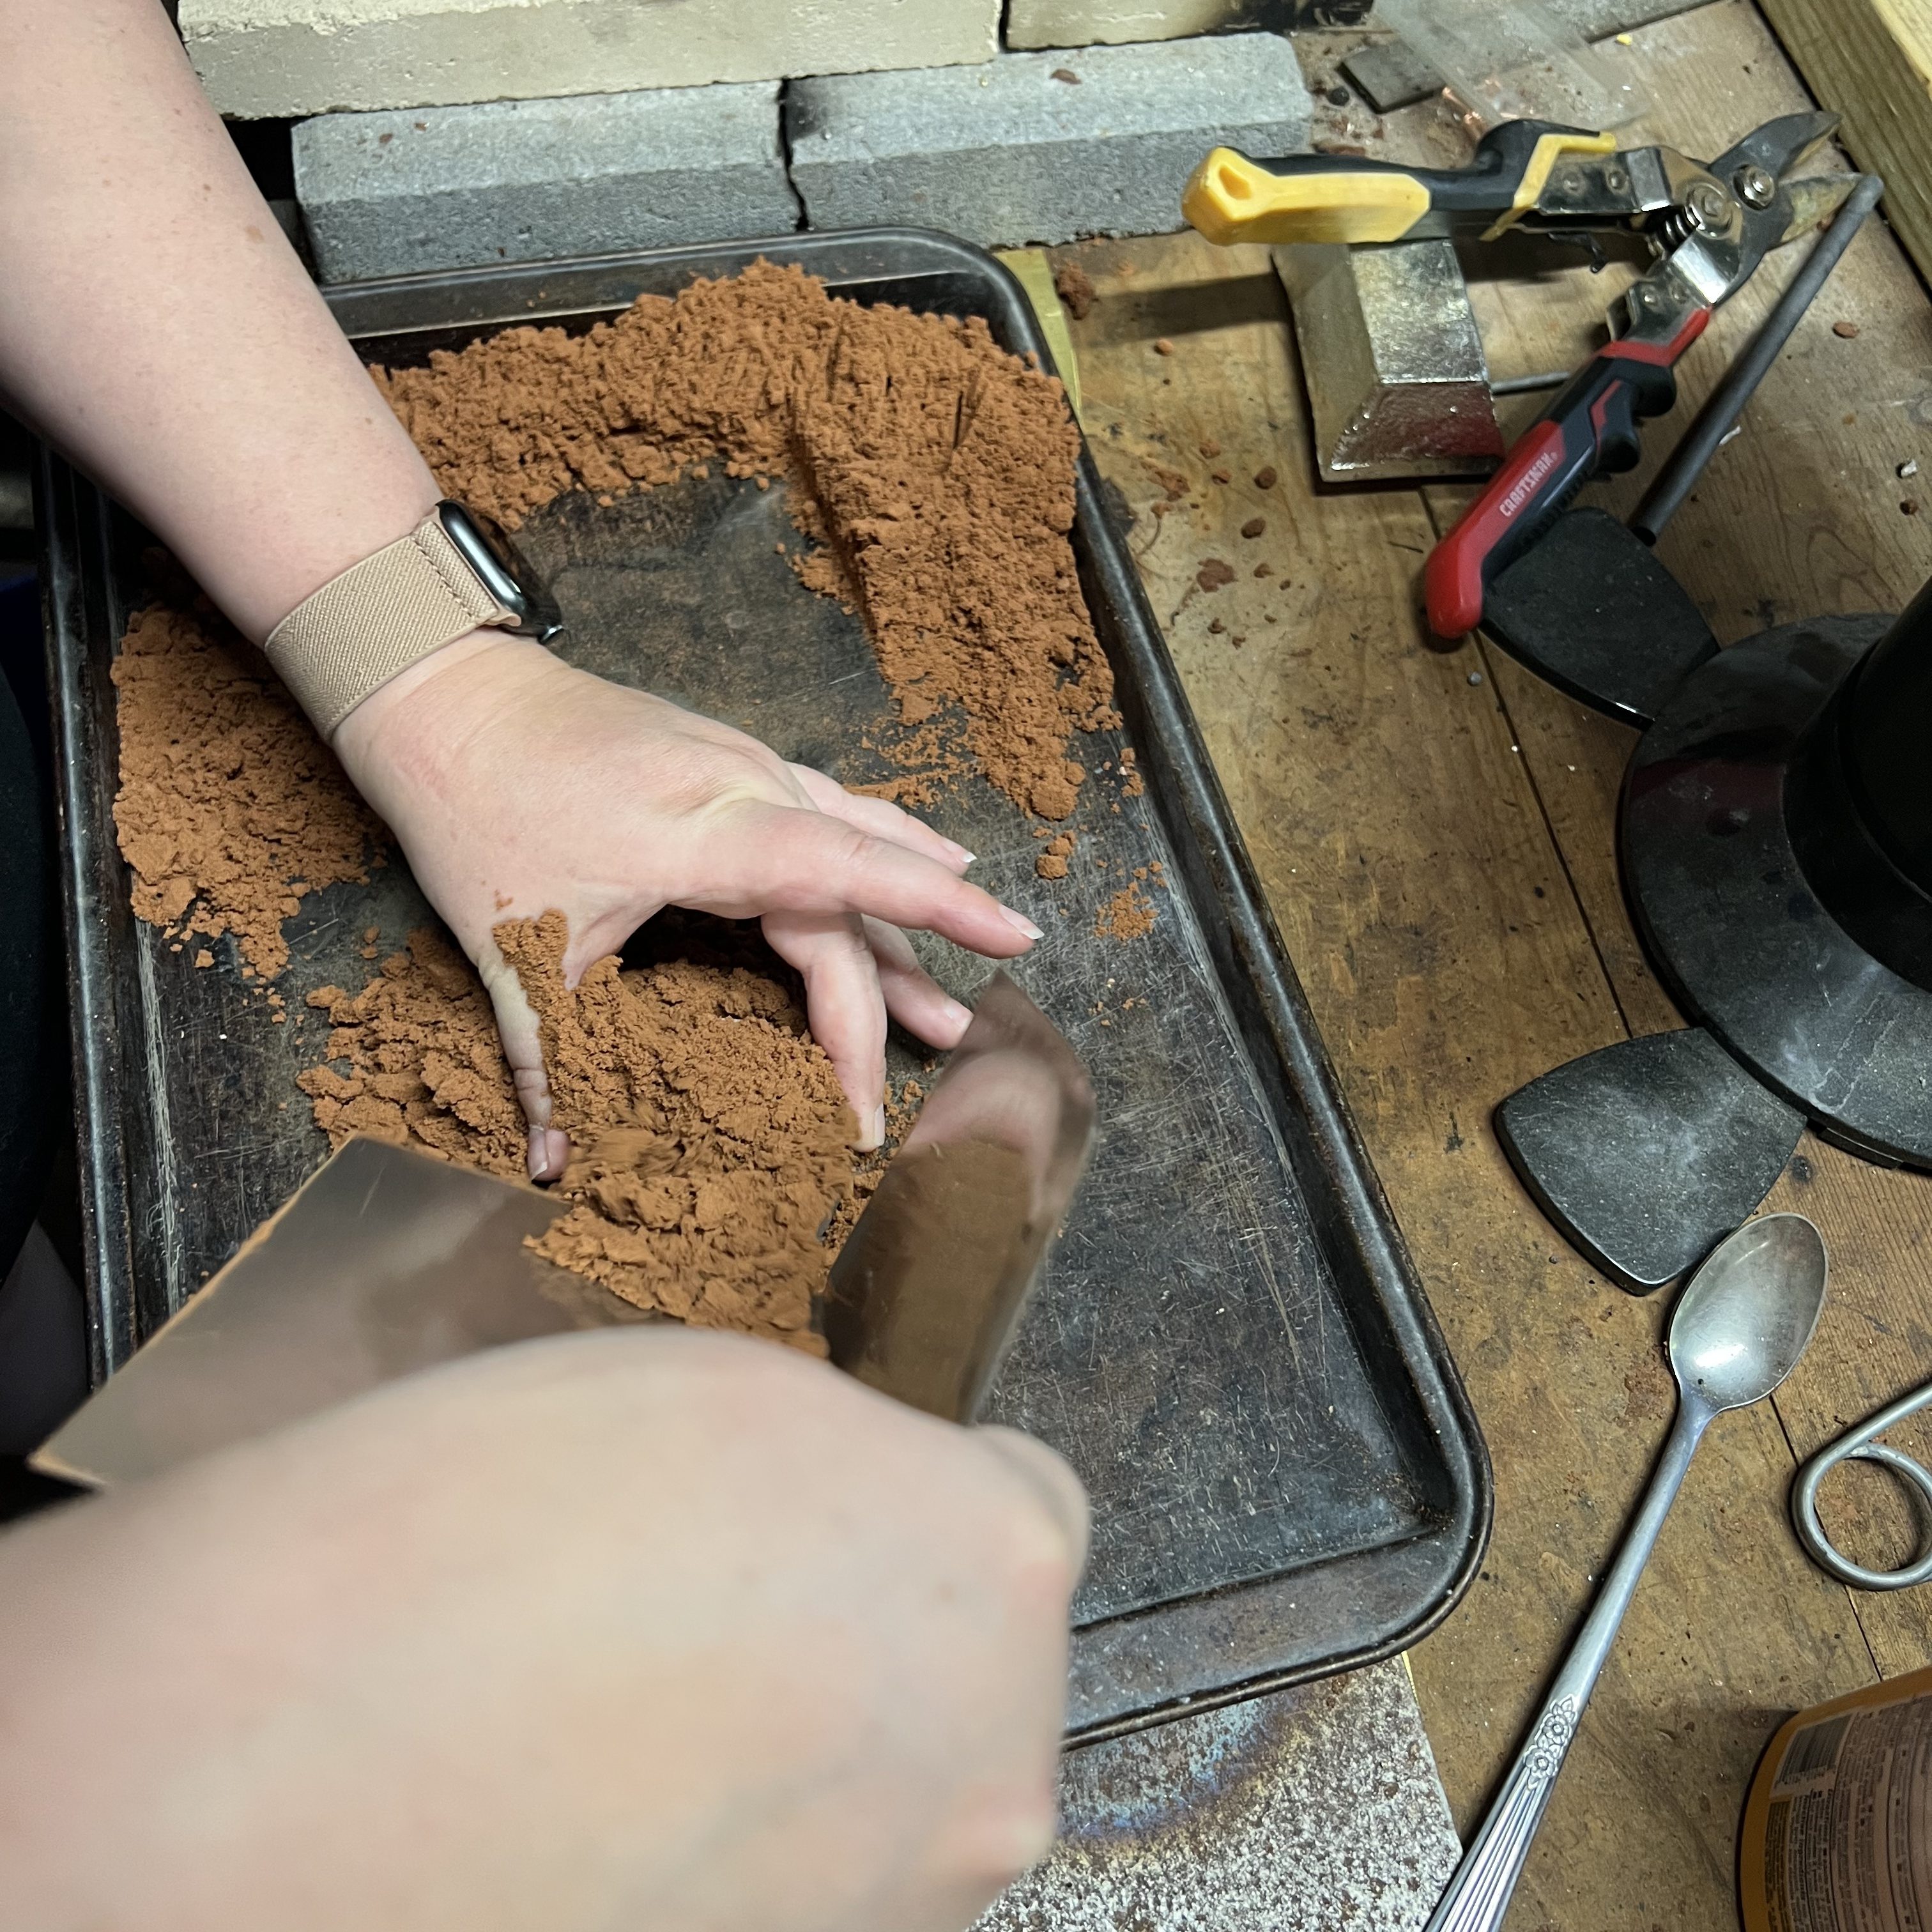
While the pewter was melting I started to pack the sand into aluminum ring molds. For this specific set of molds, the sand is packed first into the smaller ring and tamped down with a hammer, which will be the bottom ring during the pour.
Packing the sand into the ring mold. You can use pretty much any tool to pack the sand. Here I am using a piece of aluminum flashing. This actually works great for packing the sand down, leveling, and scraping it smooth.
This is what it will look like after the sand has been packed into the mold and the excess sand has been leveled and scraped smooth.
After packing the sand into the bottom ring, I pressed the master – face down – into the sand. The master needs to be centered and pressed down so that half is embedded and half is still raised.
Pressing the master into the sand. You can see that the bottom portion of the ring mold must be situated so the lip of the mold is on top.
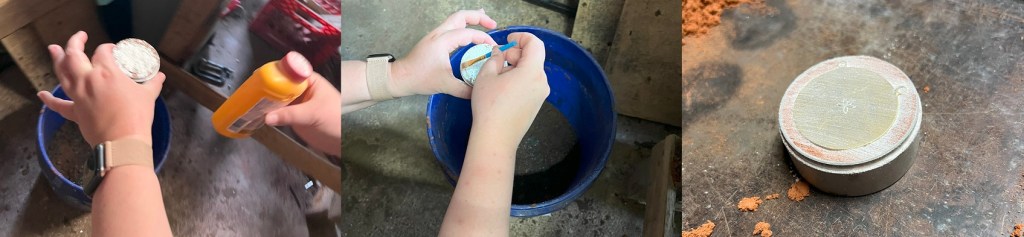
After pressing the master into the sand, I dusted it with a talcum-based powder. The talcum acts as a release to prevent the sand that is packed into the bottom ring from sticking to the sand that will be packed into the top ring. In this project, I used Gold Bond Body Powder for this purpose.
The talcum powder is sprinkled directly on top of the master and the sand, then brushed smooth with a small paint brush. Excess powder can be removed by simply using your breath and blowing it off.
The next step is to put the molds together and fill the other half with sand. The molds need to line up according to the index line (pictured below) and the top half packed the same way the bottom half was packed.
The two halves of the mold need to line up according to these lines. My nails are gross right now – sorry!
After packing the top ring with sand I separate the rings again and created a channel for the pewter in the top ring. The channel was created using a finishing nail. I lined up the nail to the center of top ring, in the middle of the imprint of the back of the medallion, and then pushed the nail through. The channel was smoothed out on the other side using a scrap piece of metal.
Smoothing out the opening of the channel on the top of the top ring. The pewter will be poured directly into this opening.
The last step to smoothly out the channel was to gently press on the opening of both sides with my finger. This helped compact any loose grains of sand in order to prevent them from falling into the pour through the channel.
Then it was time to pour! I put on my thick leather gloves and used steel tongs to grasp the cup holding the pewter.
A puddle of pewter formed on top of the sand, which indicated there was enough to fill the mold and the channel. After that I waited about five minutes for the pewter to harden and cool.
After five minutes, I separated the molds and removed the new pewter medallion.
This is what the medallion looks like coming out of the mold. The puddle of pewter is on top, with sand packed around the channel that we created with the nail. The medallion is face down under all that sand.
There was still a lot of sand packed around the channel. That was removed with a spoon and then the medallion was clean up with a small paint brush.
The pewter channel and puddle were removed by clipping the pewter as close to the medallion as possible. And, voila!
The finished medallion.
Now, the repetitive part of casting is having to do this 11 more times! I was able to cast three more medallions before I ran into an issue. While pouring the pewter, the mold started to separate and the pewter leaked out of the side.
Oops.
At first I thought I had failed to press the molds together properly and there was a gap at the seam. But it happened again, even after I had double and triple checked that the molds were fitted together tightly. My husband theorized that I might be packing the sand too tightly and there was nowhere for the hot air to escape – potentially creating an air bubble that was forcing the molds apart. We tried again, this time creating additional channels outside of the shape of the medallion in the mold and along the edge of the rings. Unfortunately that didn’t work either and it happened for a third time!
The fourth time my husband tried it for himself and it still failed. At that point we decided to take a break because we were getting frustrated. Later in the evening my husband tried a few more times and the cast failed each time. We decided that the molds themselves might be weaking from age and use (they have been in use for a few years) so we placed an order for a new set.
So for now I have four finished medallions and will have to make the last eight when the new molds arrive.
The final step in casting was the medallions to be cleaned and buffed. My husband was kind enough to do this part of the process for me. He used an 80 grit flap-wheel on his bench grinder and a 220 grit wheel on his angle grinder to give the backs a light polish. I’ll learn and use the bench grinder on the next batch. On some of the medallions we decided to drill a hole in the center using a drill press… add that to my list of tools to learn about!
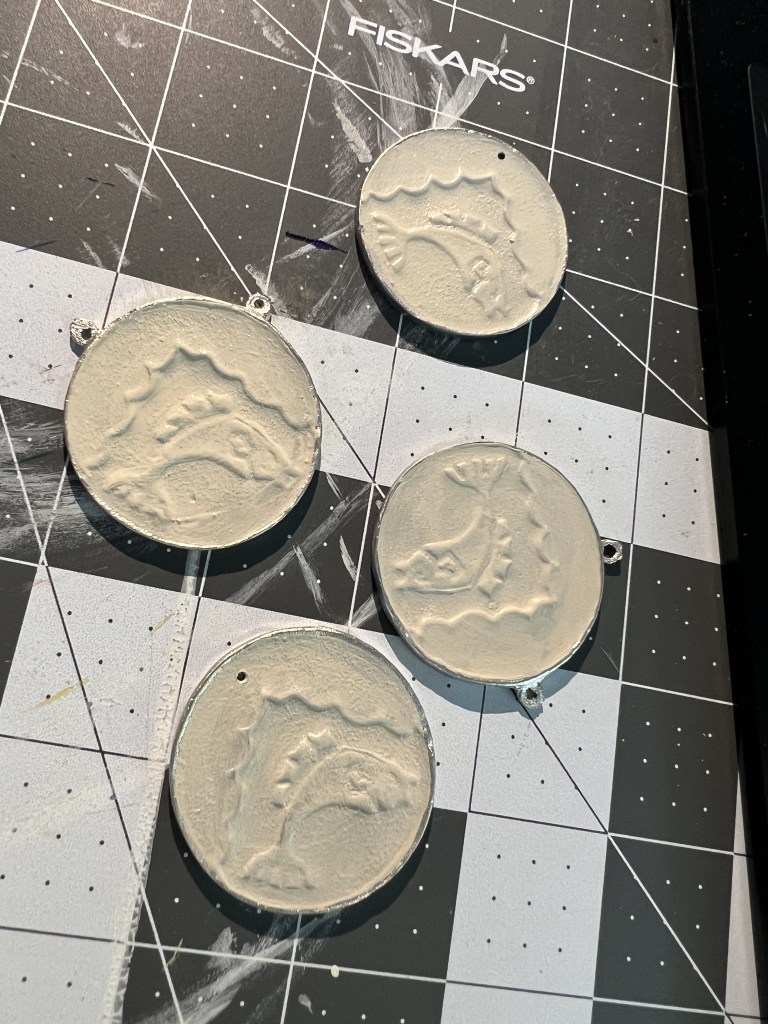
The finished medallions before painting.
According to Dress Accessories 1150-1450, many lead alloy brooches would have been painted in period (Egan and Pritchard, 1991, pg 261). In keeping with this, I wanted to paint the medallions I had made. I used a variety of brushes in different sizes and model paints for this process.
The paints that I used in the order that I used them.
I started by painted the entire front of the medallions with a base coat in “Wraithbone”.
Painted base coat.
Next, I painted the white. White is a difficult color to paint due to the size of the pigment. I ended up painting four layers – thinned with water – in order to get the coverage that I wanted.
Painting the white.
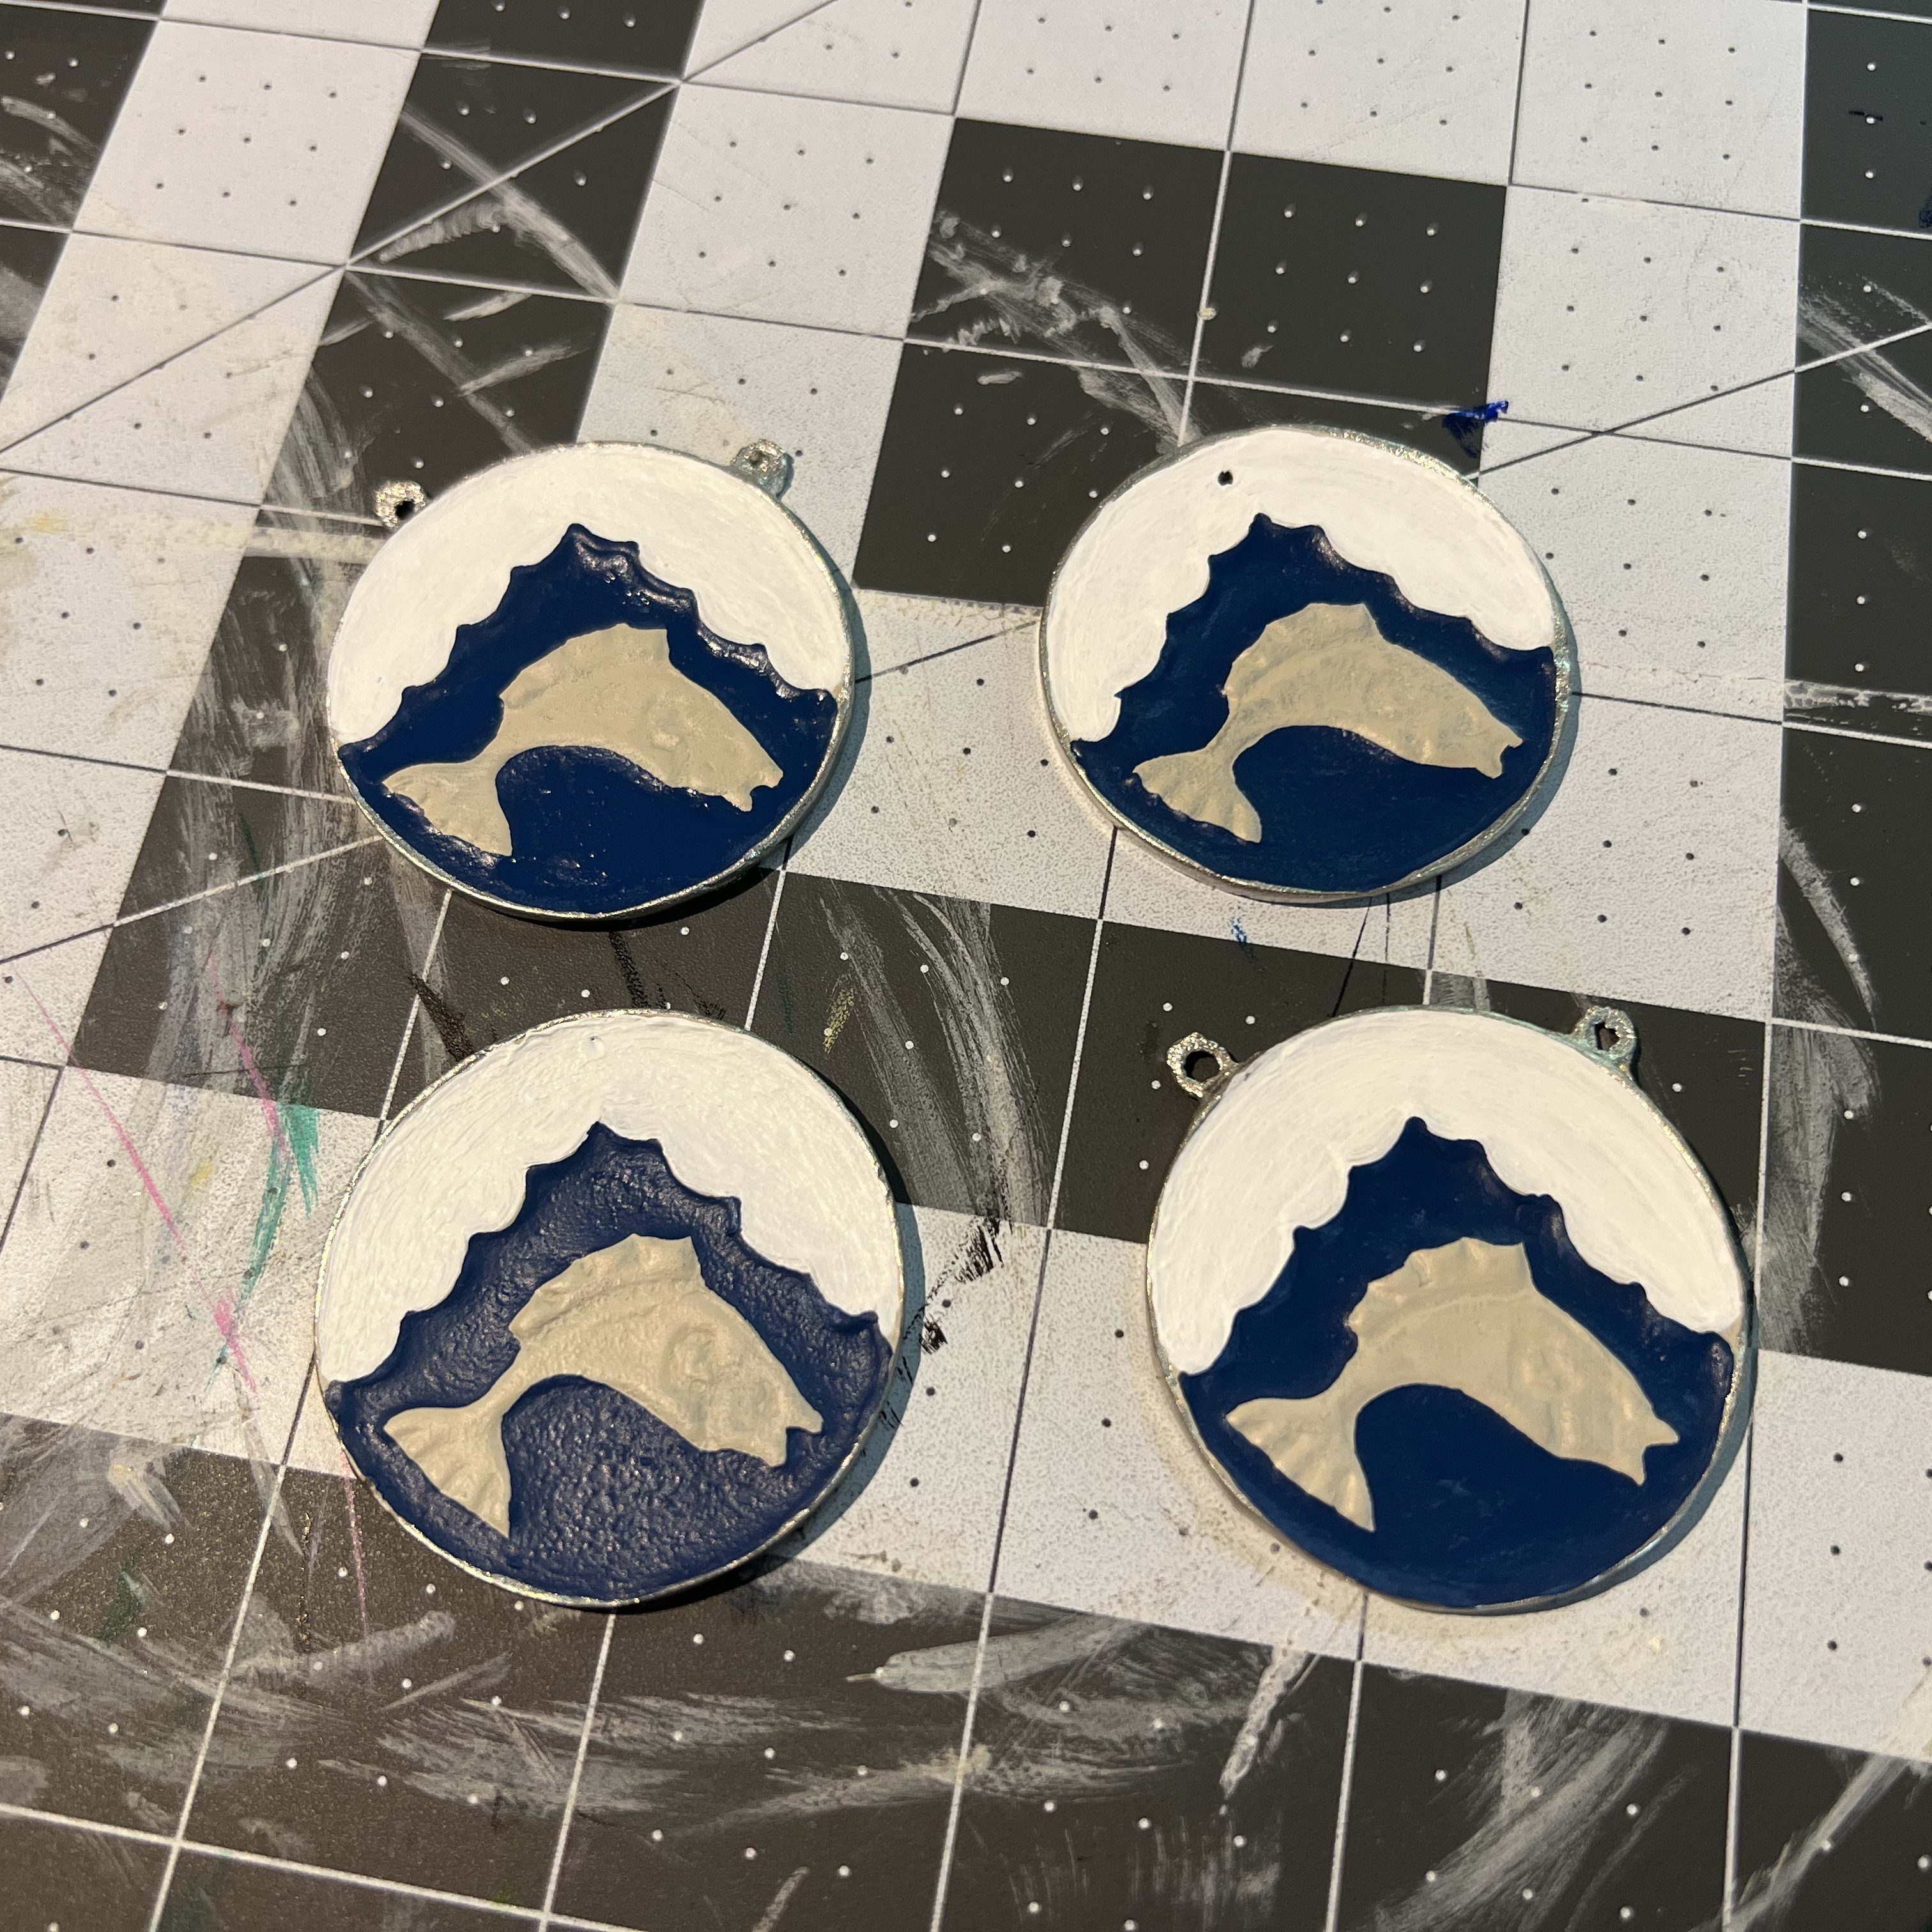
After the four coats of white, I painted the blue. The coverage of this blue was fantastic. I only needed one coat and then some minor touch ups after drying.
The white and the blue.
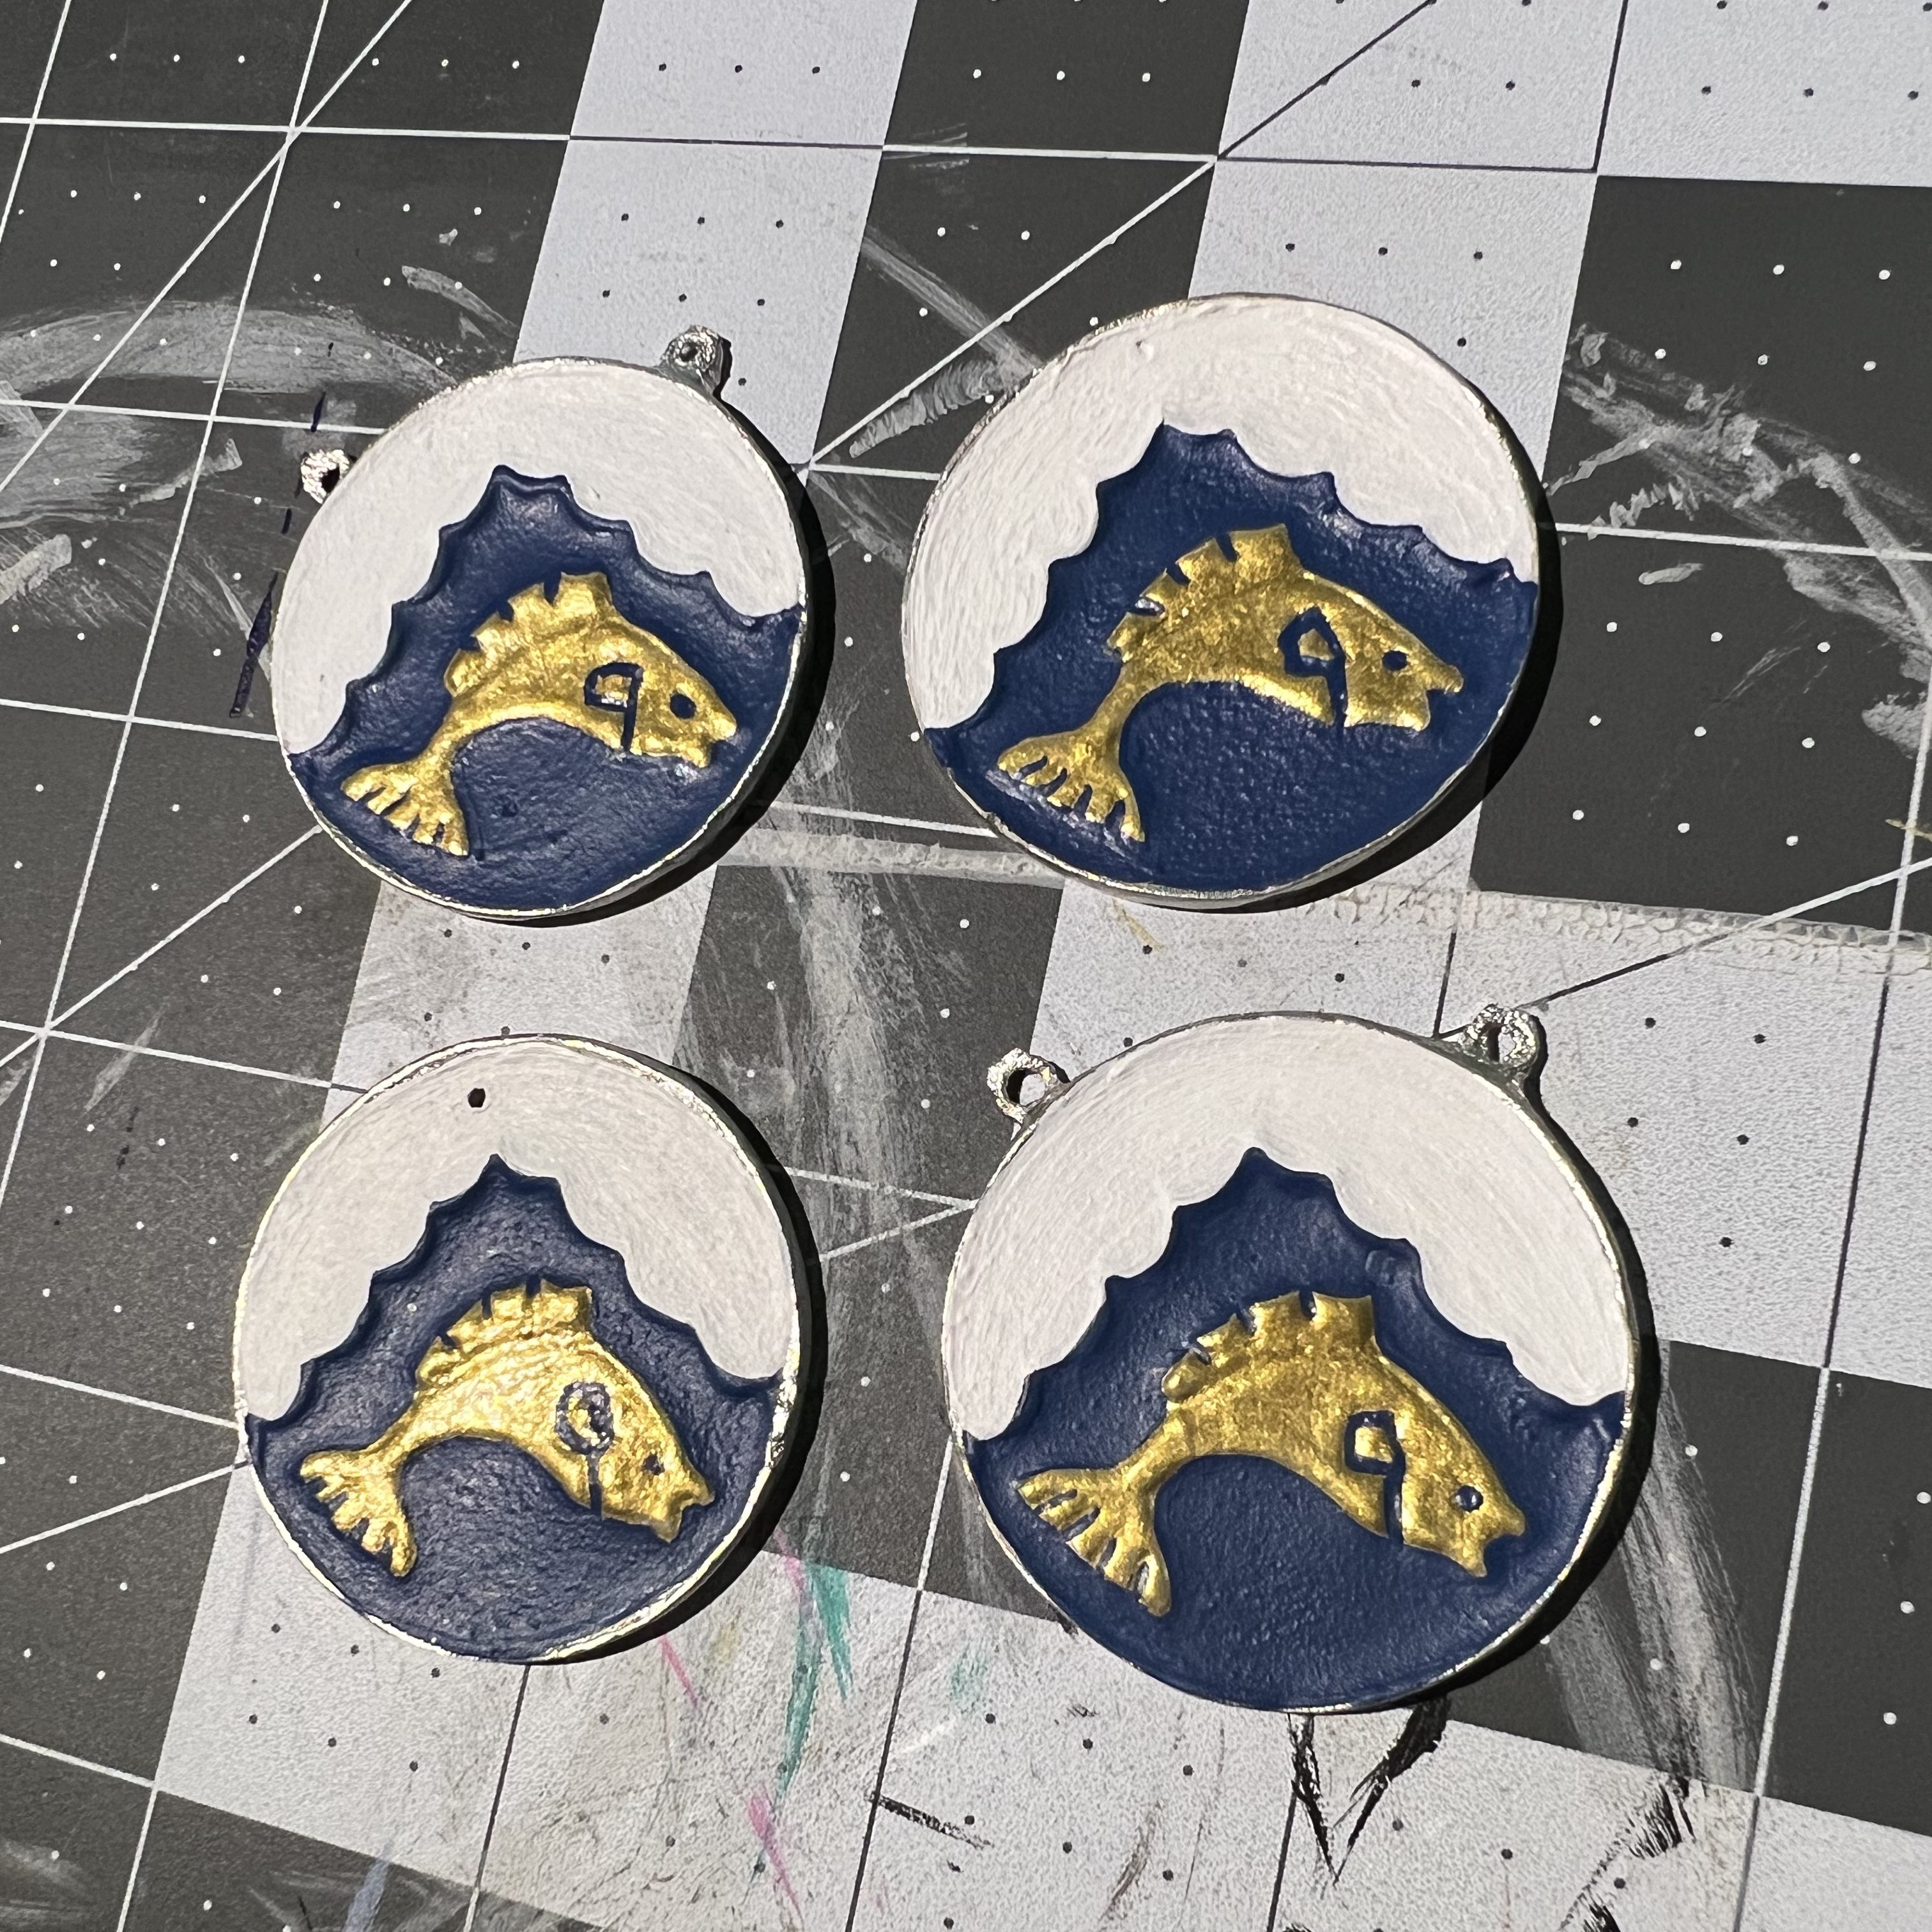
Next I painted the dolphin gold. The gold paint was very thin! I ended up more or less blobbing it on there with the brush rather than paint a million layers and it actually turned out looking very cool.
The gold ended up looking raised, almost like a second layer of brass.
For the last step of the painting process I went through with a teensy tiny brush and cleaned up the outlines with the blue and added the details to the dolphin.
Painting complete!
I allowed the paint to dry for over 12 hours. To seal the paint, I sprayed the medallions with a Krylon brand lacquer. This will help prevent the paint from chipping and protect the finish.
After a coat of lacquer and an hour to dry.
The final step of this project will be to affix a jump ring so that a medallion cord can be attached as needed.
I am very pleased with how these medallions turned out! The new ring molds should be delivered in the next two weeks so I can finish the project then. What do you think? Let me know in the comments!
UPDATE: After the new casting rings were delivered I was able to successfully cast the remaining medallions, paint them, and enter them into the Dirty Dozen Largesse competition at King’s Assessment on July 8, 2023. I won!
My dear friend, Baroness Jane Fox (OL), organized an extant garment challenge via social media back in November 2022 with the goal of recreating an original garment or accessory.
For reference, here is the description of the challenge and link to the Facebook Group:
This group is dedicated to the Extant Garment Challenge, where participants can recreate an original article of clothing or an accessory from before 1600. Any region and period is acceptable.
While this group is SCA focused, you don’t have to be in the SCA to be in the group. The challenge starts in November 2022 and will end in Fall 2023. Participants can choose to display or just gather together in Atlantia at October Coronation or November Crown Tournament. I also suggest posting your creations online for everyone to enjoy! You don’t have to make a close reproduction, simply use the original pieces as inspiration and then recreate them within your budget, ability, and taste. Please share your ideas and assist others! I have created a Pinterest board for ideas and will try to make it so anyone can post in it. https://www.pinterest.com/jezandjane/extant-garments-pre-1600/ This challenge is hosted by Baroness Jane Fox, OL, Barony of Tir y Don, Kingdom of Atlantia. https://www.facebook.com/groups/685674066263768
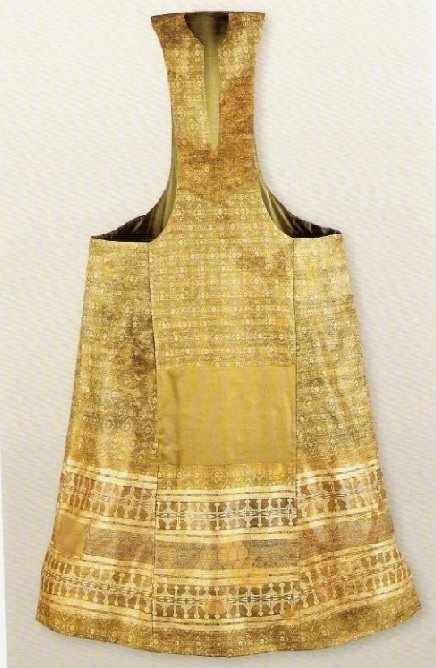
After visiting Baroness Jane’s Pinterest board I chose to recreate the surcoat of Eleanor of Castile, who lived from 1200-1244.
This image of the surcoat was taken from Pinterest and I do not, unfortunately, have the source. However, a high resolution photograph of the surcoat can also be found on the Patrimonio Nacional museum website.
After doing some preliminary research on the garment, my first task was to source the fabric that I wanted to use. I was super excited to see that Sartor had a Spanish brocade from the 13-15th centuries for sale in very similar colors to the extant. I bought 5m (16.40 feet) of the fabric, which comes at a width of 74 cm (29.13 inches).
While this fabric would be perfect for the primary pattern I still needed additional fabric or trim for the bottom of the surcoat, as well as a fabric for lining. I did end up purchasing a sari from Etsy, as well as setting aside some other sari fabric that I had left over from my Roman garb in hopes of finding a good match for the pattern at the bottom. For lining I decided to use a beige silk that was also purchased from Sartor.
After my fabric arrived it was time for construction! Lucky for me I live very close to Baroness Jane, who was able to help me with patterning and recreating the surcoat over the course of a weekend.
Our first step was to brainstorm how to pattern the fabric in a way that resembled the extant piece as much as possible. One of the things I found interesting about this garment is how obviously the pattern on the fabric does not line up at the seams. To our modern eye this is quite jarring and unattractive. But seeing this on an extant piece leads me to believe that the priority was conservation of fabric, even when worn by a Queen.
Despite this feature my goal was to have the pattern line up as much as possible. With that in mind, Jane and I brainstormed a variety of pattern possibilities using my hip and shoulder measurements as a starting point. The other measurement we needed to consider was the bottom hem as the kirtle that it would be worn with has a hem of over 200 inches.
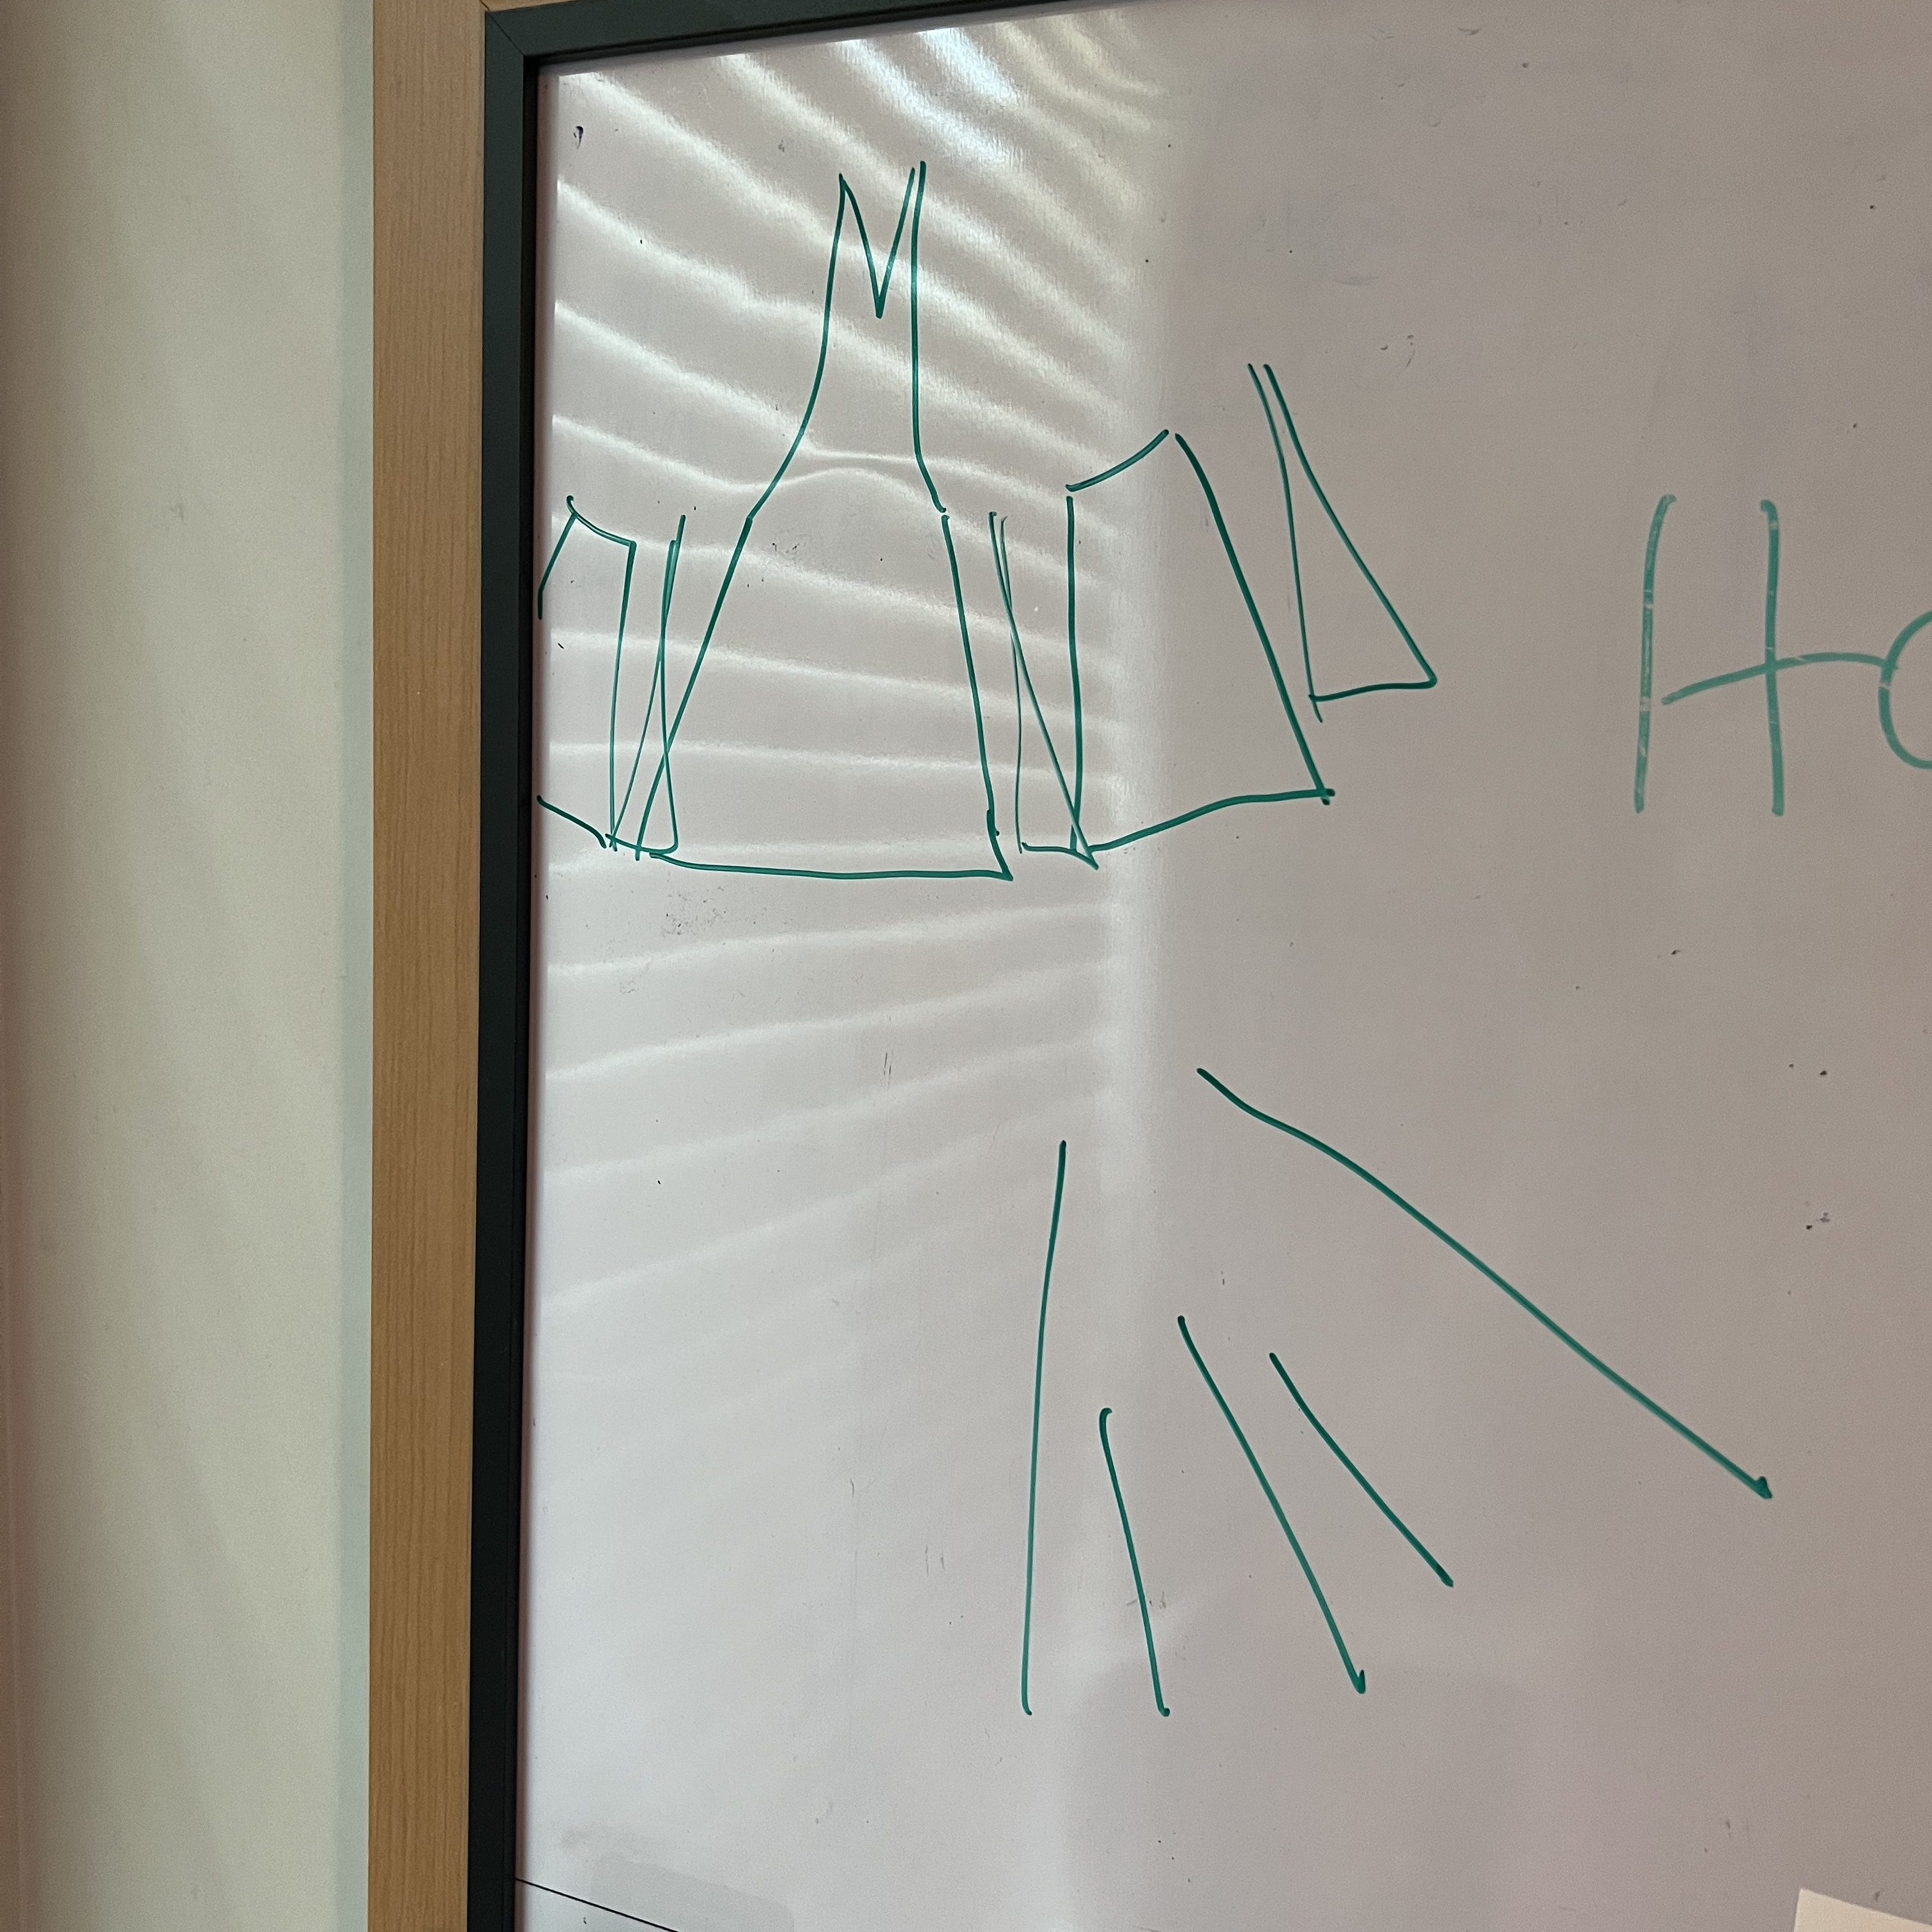
Brainstorming!
The image above shows our brainstorming process, featuring a picture of the extant dress, some sketches in pencil, pins, and three measuring tapes. We also compared the pattern of the extant piece to another common surcoat pattern. That pattern typically features gores, however the extant does not have gores. Instead, it has four – what we referred to as – “trapezoid” shaped pieces – two in the front and two in the back.
Some preliminary sketches on the white board. You can see we played with the idea of adding gores to get more fullness in the skirt.
The final pattern with preliminary measurements.
In the end, we did not add any gores. The measurements worked out perfectly so that the bottom hem was wide enough at 116″ to accommodate the underdress.
Final measurements.
Despite all our efforts to plan the pattern as perfectly as possible mistakes were made! Two of the trapezoids were initially cut the wrong size, while two others were cut with the selvage on the left instead of the right. Luckily we were able to cut and piece the mistakes and fix the pattern!
We had to recut and piece together two of the trapezoids so that the pattern would be correct. The pieced section is at the bottom of the skirt so it is nearly invisible now. Remember, piecing is period!
The last step of patterning was shaping the neckline and side openings to match the extant garment.
Cutting the neckline. You can see the side has been shaped, as well, so it is no longer completely straight.
We didn’t take any measurements of this process. Instead, we more or less eyeballed the look we wanted by trying the surcoat on over the kirtle and shaping it to match the neckline and emphasize the bust and waist.
Final fit over the kirtle to mark and hem the bottom.
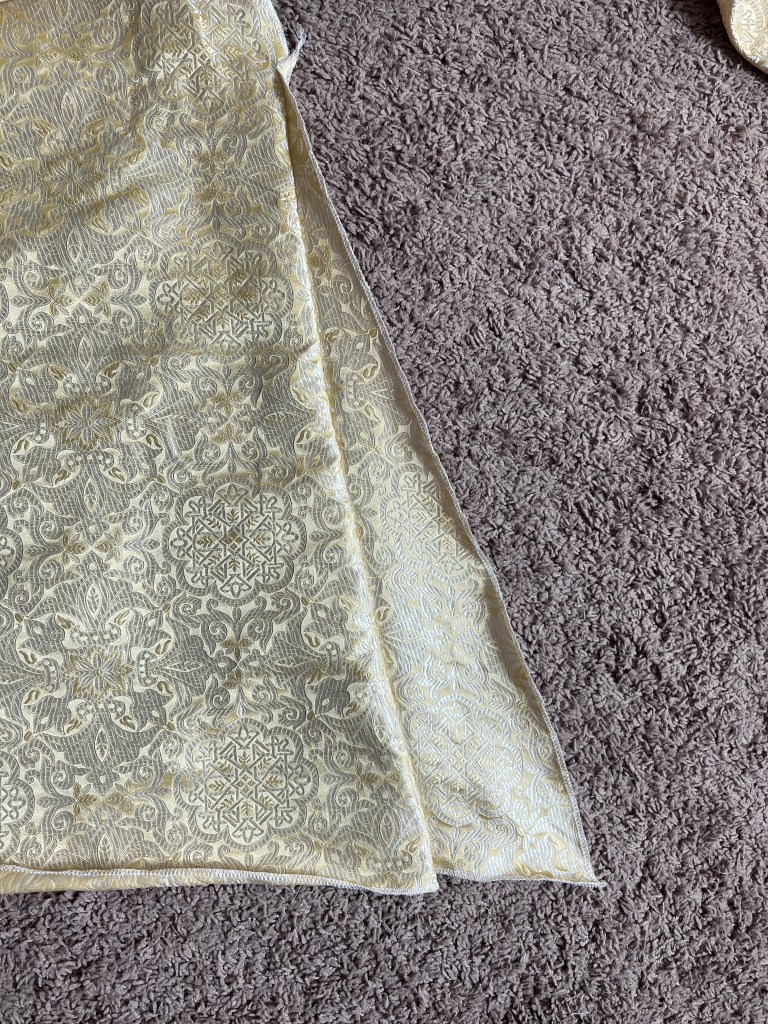
After we achieved the final shape we added a bag lining (aka the bagging method) to the top of the surcoat and a hem facing to the bottom in the beige silk that I mentioned earlier.
The finished surcoat next to a picture of the extant garment!
I’m very happy with how this turned out in the end – it’s a beautiful surcoat! I am still considering whether or not to add trim to the bottom to make it more like the extant piece. I’ll be pulling out my sari fabric soon to do some comparisons in order to visualize the final potential product. What do you think? Should I add trim or leave it as is? Let me know your thoughts in the comments!
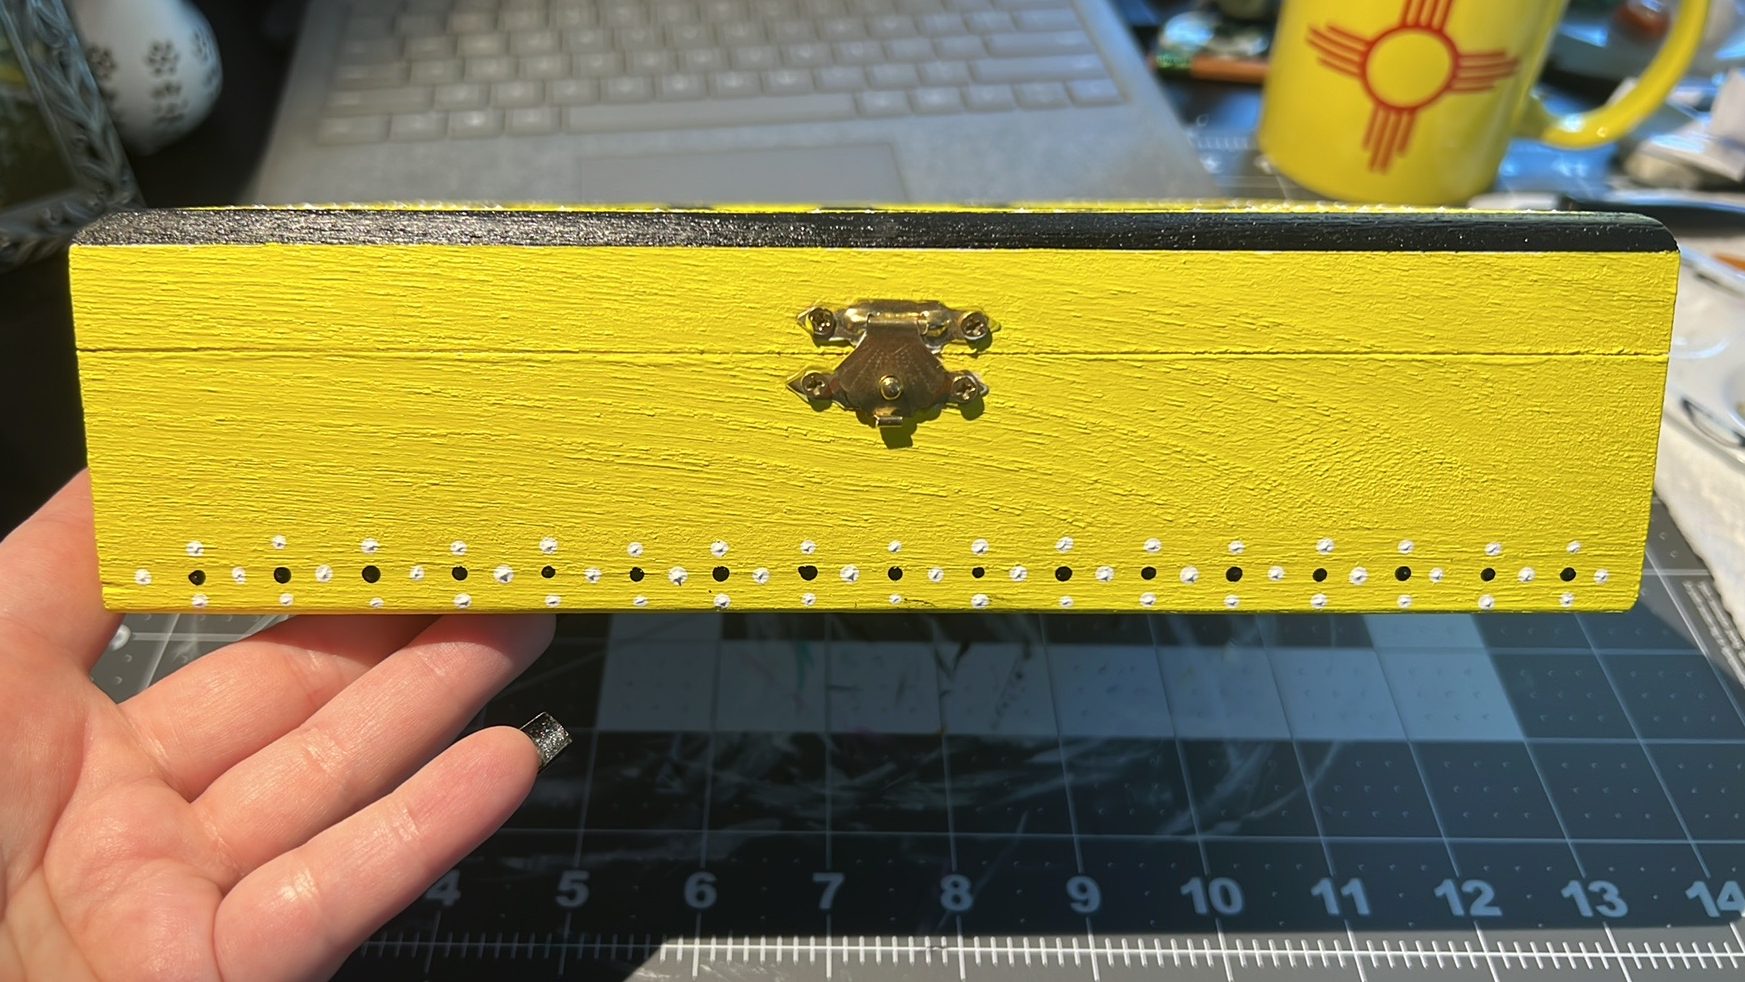
In early October my husband asked me if I could paint a prize box for our friend, Lord Matthew of Norfolk, who was fighting his prize fight to advance to rank of Free Scholar within the Academie d’Espee of Atlantia.
Even though I don’t have any advanced skills in regard to shading or dimension, I really enjoy painting so I was happy to do it. I surfed Pinterest for some inspo pics and settled on a design that would feature the letter “M” – for Matthew – and the colors yellow and black – for his heraldic device.
I started by creating a stencil for the letter M. I used The Art of Calligraphy: A Practical Guide to the Skills and Techniques by David Harris to choose a script that I liked.
The letter M from the script Bastard Capitals.
I just used a pencil and plain white paper to create the stencil.
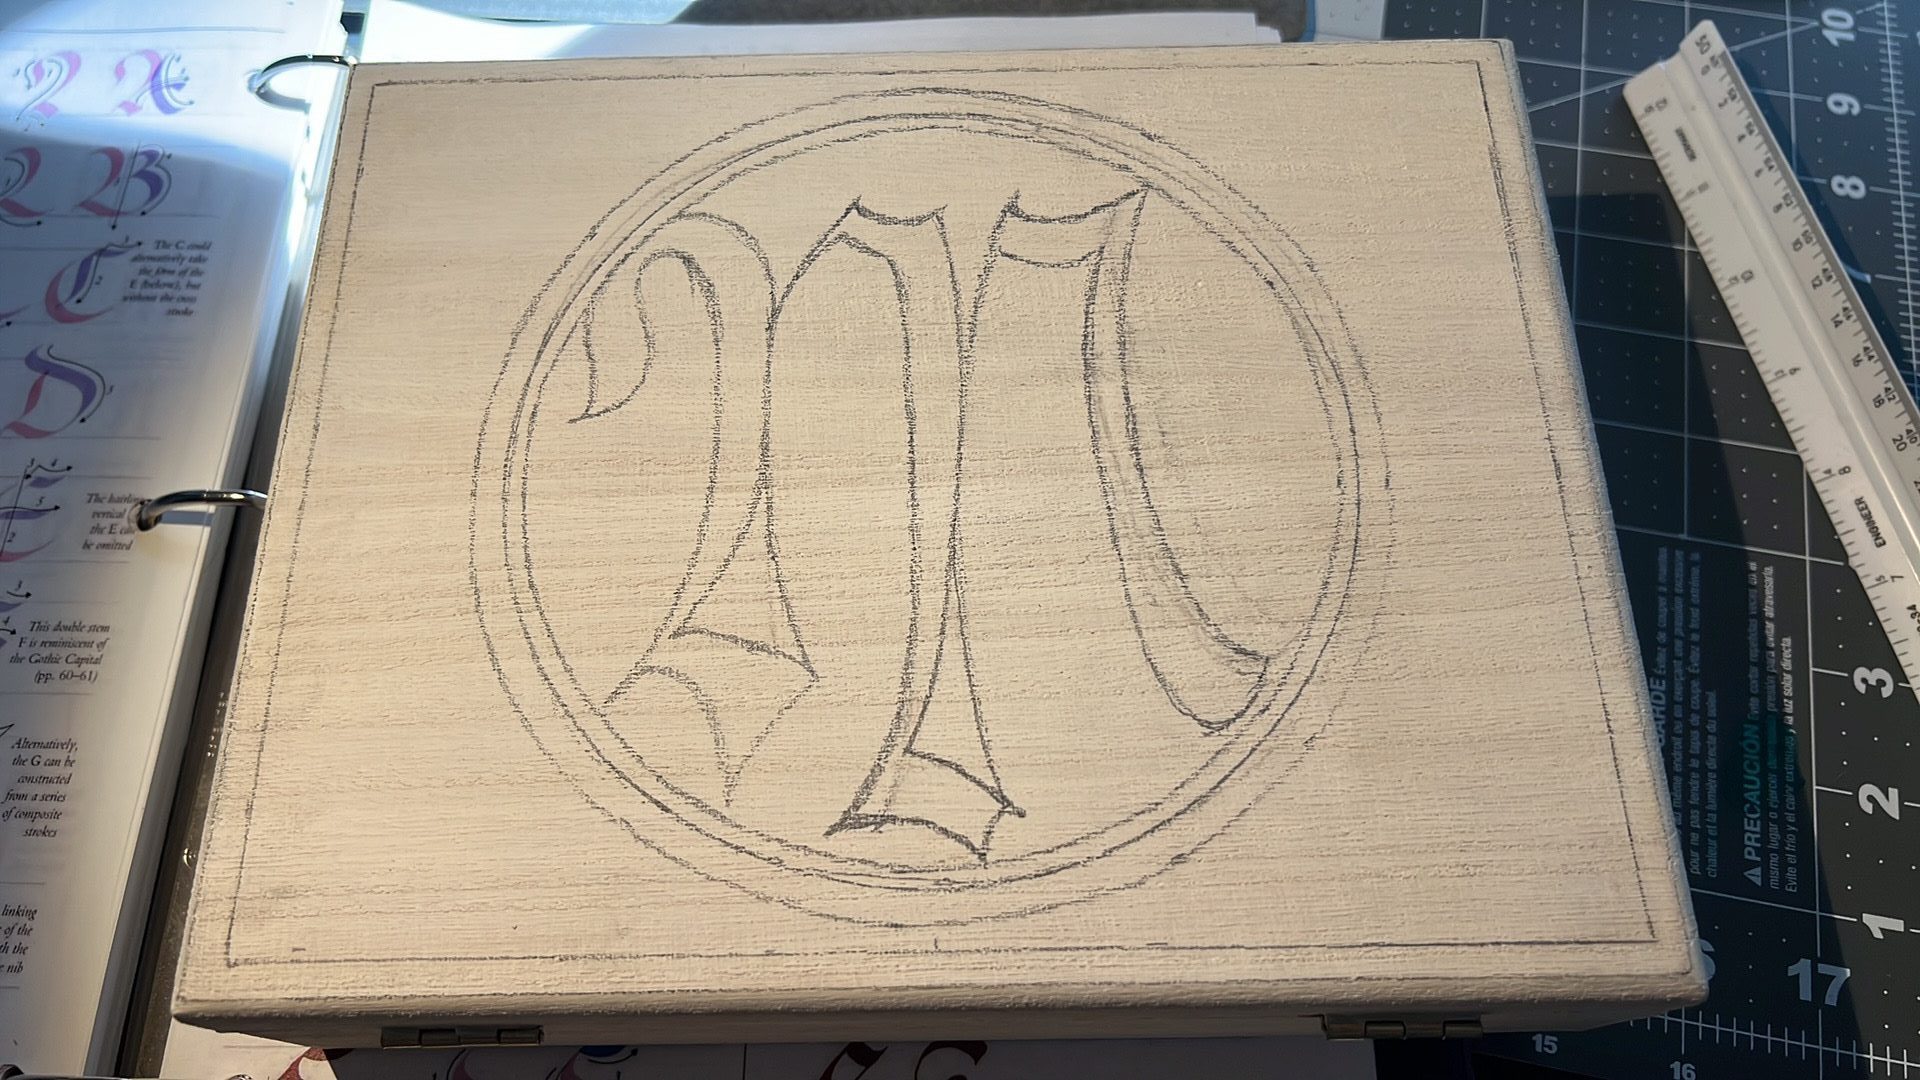
After my husband sanded the box smooth, I drew the design I wanted in pencil on the lid of the box. Then I covered the entire box with acrylic gesso. Gesso provides a base layer that will prevent acrylic paints (which are water based) from absorbing directly into the wood and help keep pigments bright.
Basic design for the box.
One thing that I’ve had to incorporate into painting is good time management! It’s important to plan well so that there is plenty of time for the layers of paint to set and dry properly. I like to err on the side of caution and allow 12-24 hours between layers.
After allowing the gesso to dry I went in with yellow acrylic, which covered the majority of the box. Another thing that I’ve learned about painting – and from my husband, who has way more time and experience with painting than I do – is that some colors are more finicky than others. Yellow and white are especially difficult because the pigmentation is very thin. These colors can often be streaky and require more layers.
Yellow and white acrylic.
After painting an initial layer of yellow, I decide to go in with a base of white acrylic inside of the circle (seen above) in order to make the yellow there pop a bit more. The first layer just looked a bit too drab and flat. In retrospect, I wish I would have put down a layer of white acrylic first everywhere on the box that I planned to paint yellow.
Next, I painted part of the circle and the letter “M” black and added some black trim to the edge of the box.
I used some of my husband’s Tamiya model masking tape to get clean lines on the edge of the box. You can really see the difference in the yellow within the circle (where I put a base of white acrylic) and outside of the circle (where I just painted the yellow directly over the gesso).
Next, I created a grid on the lid of the box painting along the edge of a ruler.
The lines are not perfect but that’s okay!
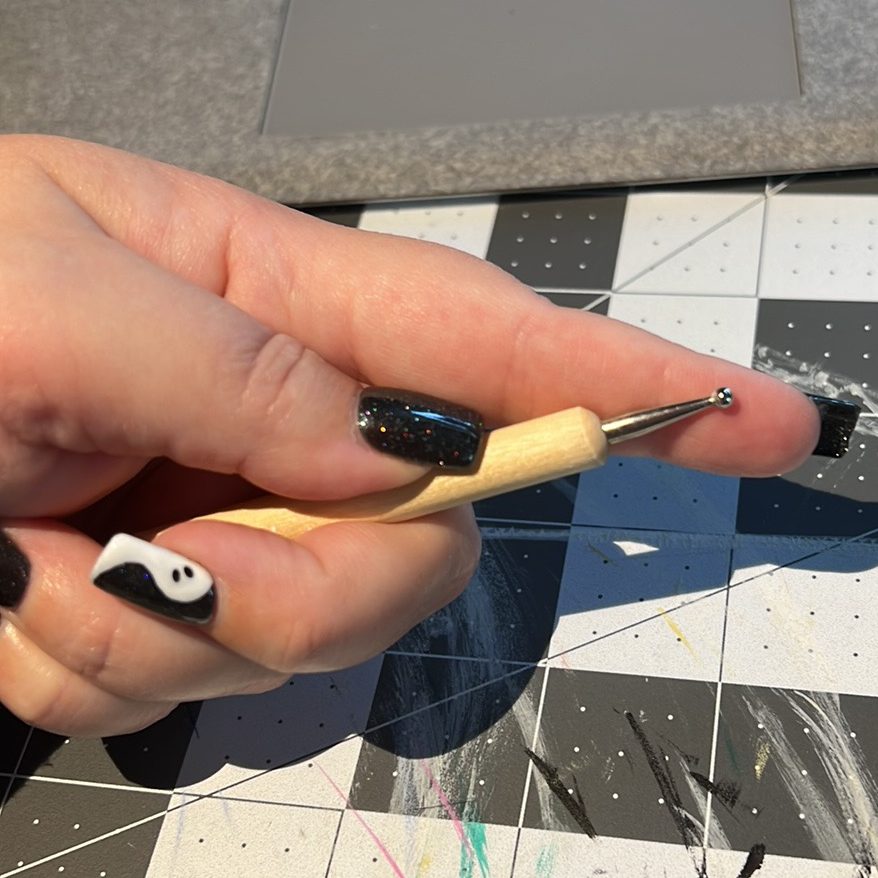
I then took a dotting tool/ball stylus and created a design in black, white, and gold acrylic on the lid and along the bottom edge of the box.
Size of the dotting tool/finger for scale.
Dot design along the bottom edge of the box.
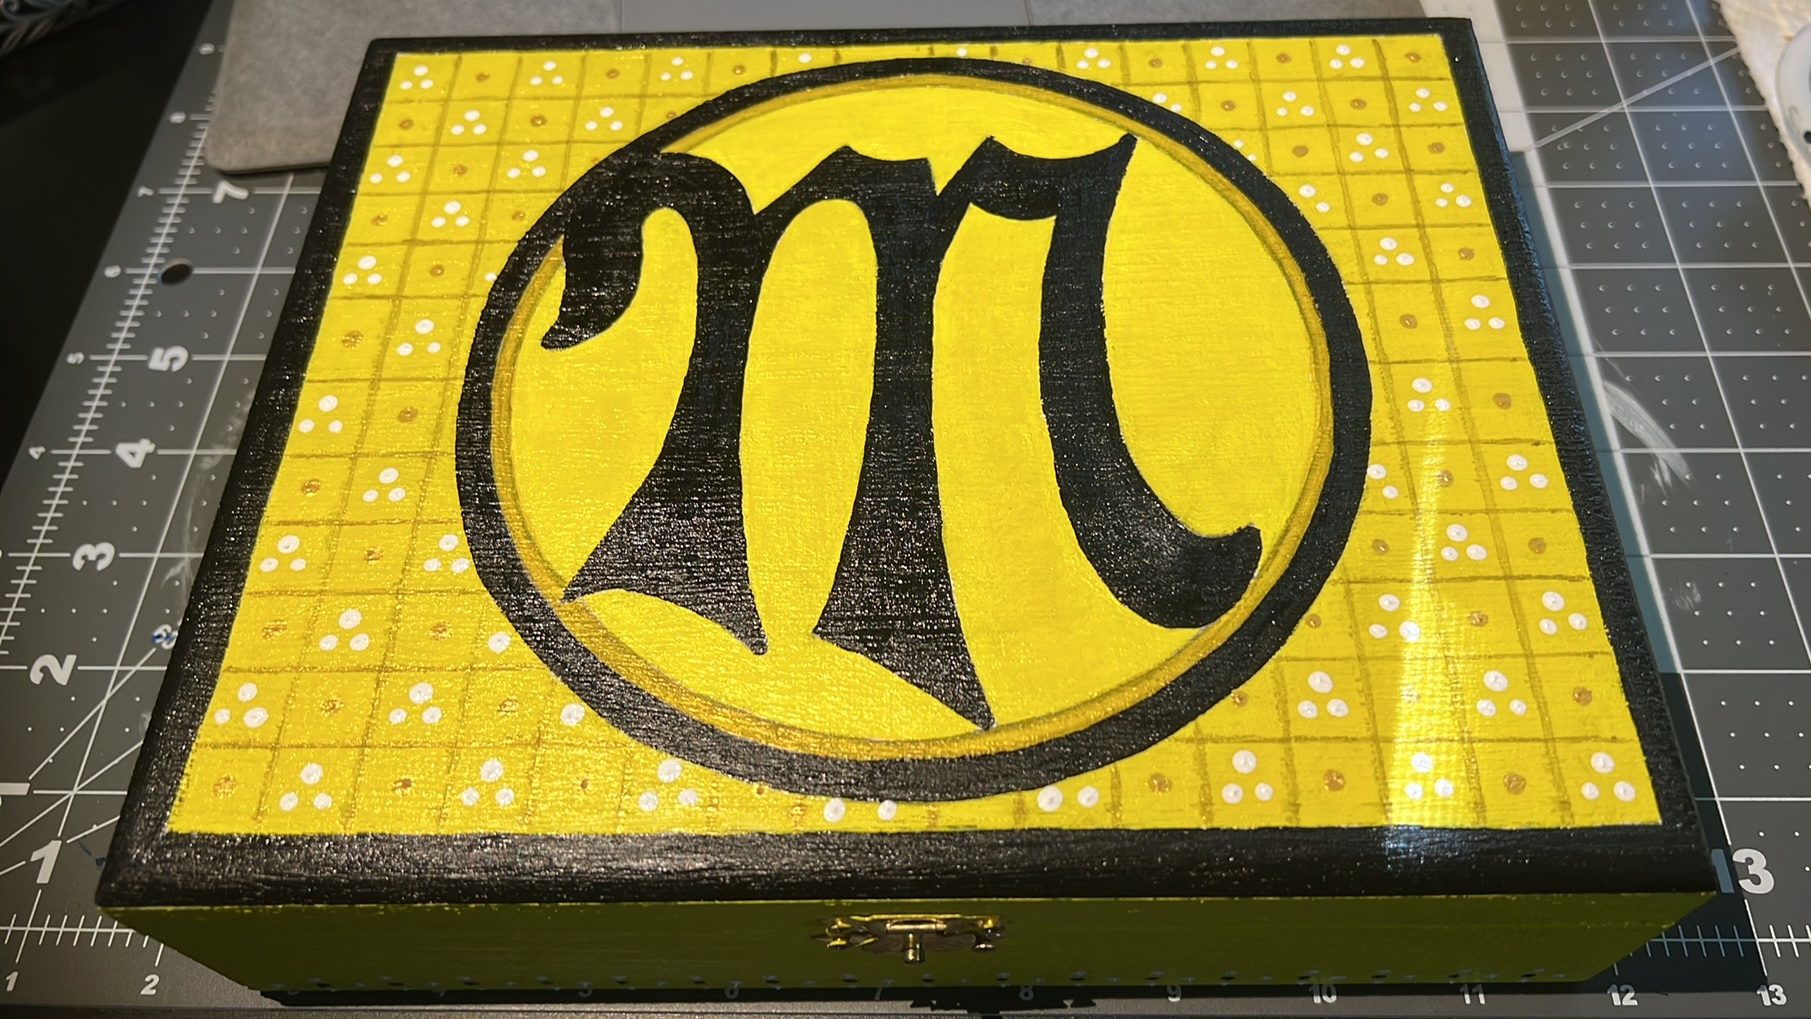
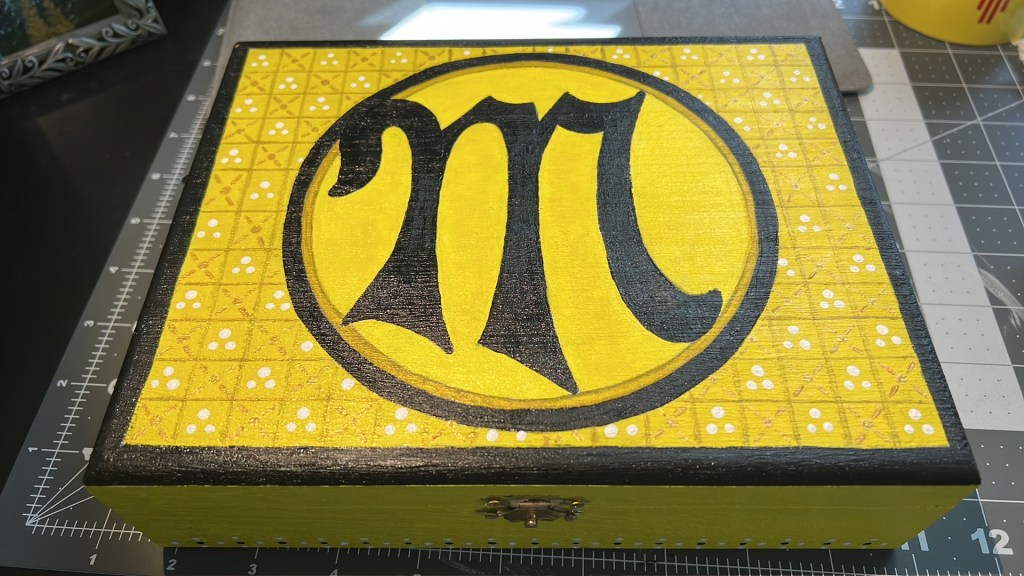
Dot design on the lid of the box.
The last element I added was some diagonal lines with the gold dots using a small, angled brush.
Voila! Box complete!
The last step of any painted box is to seal it in order to protect the paint and add some shine. I used a high gloss spray lacquer from Krylon .
I really enjoyed this little project. Painted boxes are a fun way to enhance gifts and add to the background/ambience of events and ceremonies in the SCA.
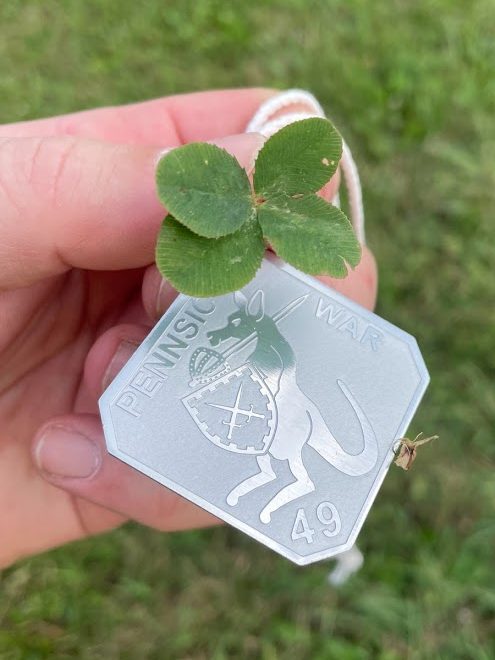
We did it! After a three year town run we finally made it back to Pennsic War.
This year’s site token. We found a four leaf clover right after we trolled in!
I knew things were going to be different this year. Prior to the event my husband and I had taken over the running of our camp (Grimmsfield – N22) due to most of our usual campmates being unable to attend. I was struggling to fill volunteer shifts for Newcomers Point. I was also coordinating the schedule and retinue for TRM Atlantia again, as I had in 2019. All of this was, quite literally, keeping me up at night. Yet oddly enough – once we actually arrived – it didn’t feel like things had really changed. The details were a bit different but the atmosphere was the same. And everything that I had been stressing about prior to leaving, worked itself out by the end.
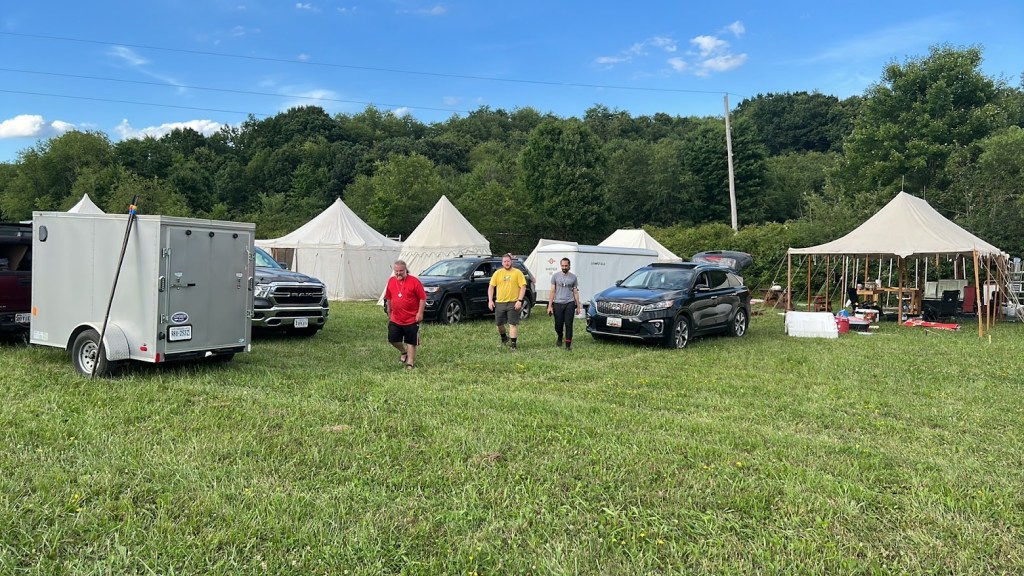
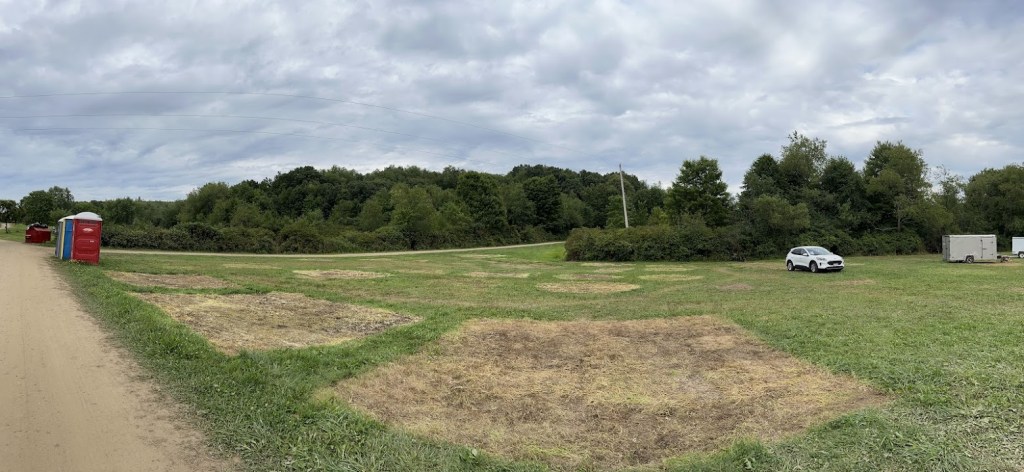
We arrived Friday, July 29th around noon. Set up went smoothly and camp was all put together in three days.
Vehicles and trailers during set up on the first day.
I was definitely nervous about how camp would run this year – if the layout would work, if we would have enough folks to help things run smoothly, if personalities would work well together, etc. So I was very happy that everything went really well in the end. While there are always a few minor hiccups at every event and even more so at a two week long event like Pennsic, there was nothing that went wrong that couldn’t be fixed or that we couldn’t work around.
After camp was all set up I opened Newcomers Point on the first Sunday.
Newcomers Point under the Watch Tent.
Usually volunteer shifts at Newcomers are about 70-80% full prior to Pennsic. This year we only managed to fill about half of the shifts, which meant a lot more folks had to volunteer on site. Luckily I had a few individuals who really sacrificed a lot of their time and effort to sit at Point every day and fill the shifts that were empty. This made my job (and life) much easier.
My husband and I being silly during one of our shifts at Newcomers.
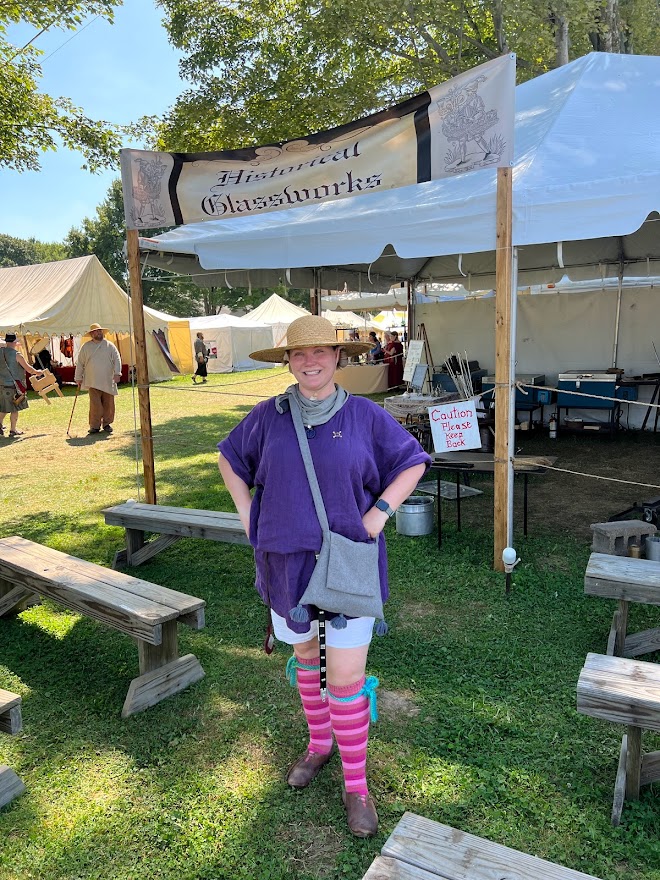
Before leaving for Pennsic I had the idea to take a picture of what I was wearing each day – a diary or journal of garb or “outfits of the day” for the War. Of course there were several days when I forgot – despite my husband’s reminders – but I still ended up taking a lot more pictures than I usually do and that made me very happy. I exclusively wore 14th century and Roman this year, though of course all the days I forgot to take pictures were when I was wearing Roman!
The weather was so hot on some days that I opted for braes and a short tunic.
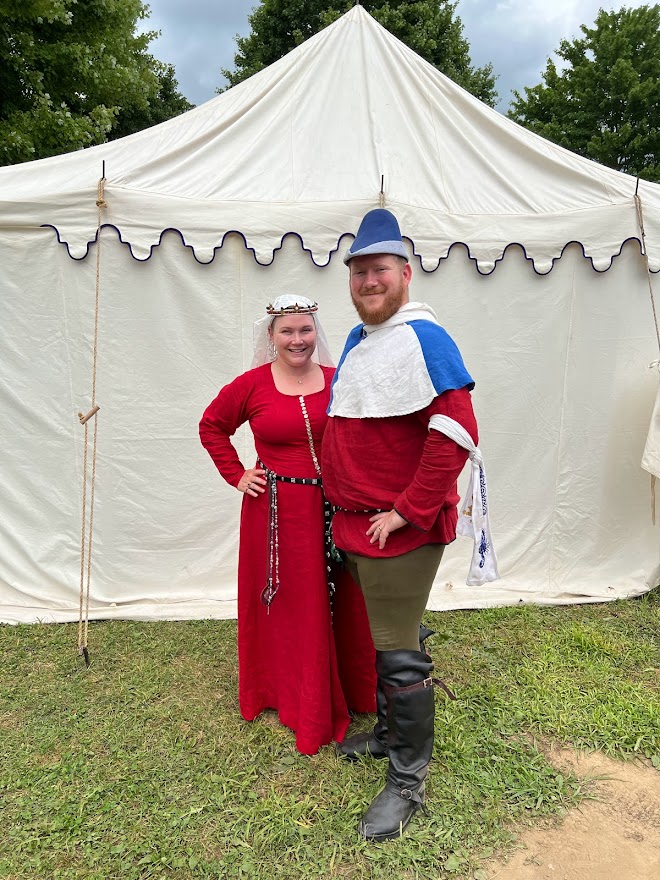
My husband does a good job of matching me when he can!
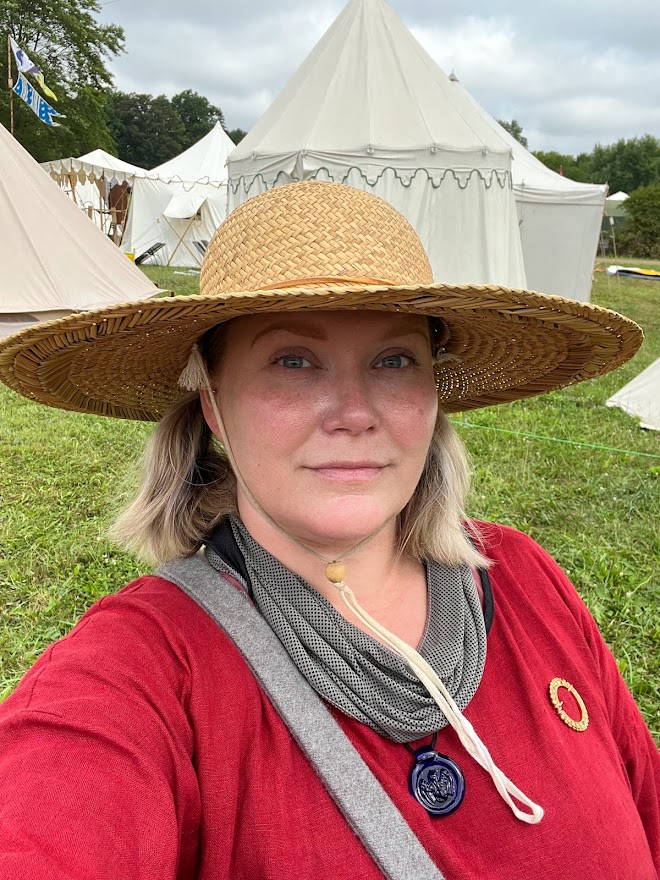
Another hot day in a simple tunic and an (obviously mundane) towel to keep my neck cool.
One of my favorite pictures from this year. I love seeing the tents set up in the background.
Tuesday of War Week we hosted a vigil in our camp. It was one of the best nights of War this year!
Our camp at night during my friend’s vigil.
Set up for the handwashing ceremony.
After Atlantian Great Court on Wednesday Night.
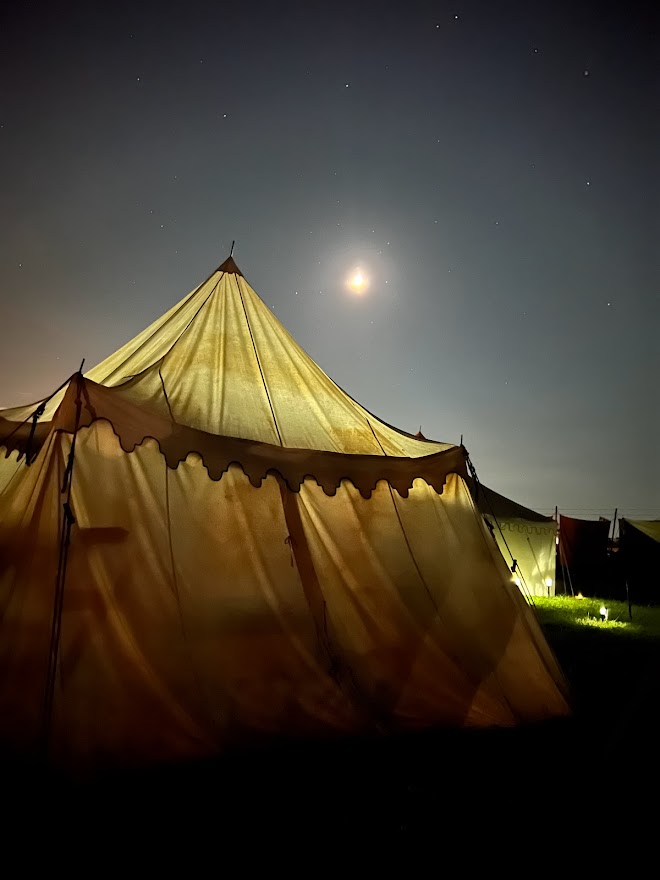
I love Pennsic at night. And I managed to get a few photos using my new camera phone that I am really happy with how they turned out!
View from the camp’s dayshade.
The lake at night from Casa Bardicci.
If I’ve learned one thing from my years of attending Pennsic it’s that each year is a different experience with a unique set of challenges.
Overall, it was a good year. Next year will be better!
A clarification regarding the title of this post before I get started… No, I haven’t received another Peerage. I just consider myself to be a “New Peer” still as it’s only been 11 months since I became a Member of the Order of the Pelican. Most especially since I’ve only been able to attend a few events due to the ongoing pandemic.
Also, I needed a catchy/rhyming title for this post, so here we are!
Last year the Board of Directors re-opened the SCA for events starting May 31st. The Kingdom of Atlantia held 16 in-person events between June and December of last year. Many other events were cancelled or moved online due to continued concerns surrounding Covid-19. Of the 16 in-person events that were held, I was only able to attend three. Now, 16 in-person events might seem like a fair number. But, for comparison, the Kingdom of Atlantia held 68 in-person events in 2019, before the pandemic began. I attended 24 events that year!
Of course, because the pandemic is ongoing, a lot of activities remain virtual. The monthly Chatelain meetings that I run as Kingdom Chatelain are all virtual. The bi-weekly Great Officers meetings that I attend are virtual. All of the classes that I take and teach through the University of Atlantia are virtual. In fact, we are still having virtual courts, as Kingdom 12th Night was recently cancelled due to the Omicron variant.
Virtual SCA is still very much a thing.
And it is likely to remain so, on and off, as new Covid variants rear their heads. While I will continue to participate in Virtual SCA as I have been these past (almost) two years now (!!), I am very much longing for the day when we can gather again at big events and enjoy each other’s company. I truly believe the SCA is an event based organization and we are all hurting a bit from the lack of in-person contact.
Now that 2022 is off to a start I’ve been giving some thoughts to my resolutions for the year. While I don’t usually do New Year’s Resolutions for myself, I do like to make SCA resolutions as it helps me with goal setting. However, one (of many) unfortunate side affect of the pandemic is that it makes planning very difficult – as events can be cancelled and/or rescheduled rather last minute. This, in turn, makes goal setting very difficult. Additionally, I’ve been experiencing a lot of pandemic fatigue – as have we all! – and I’m not very motivated to start or finish projects. With the above in mind, and being a big believer in not setting myself up for failure, I’ve opted not to set any new SCA resolutions or goals for this year. Rather, I’m going to list my ongoing “projects” for the year and focus on the progress of these.
But before I do that, here’s a recap of my goals from last year with commentary/completion notes:
For Me
Update blog with posts about projects and events from 2019-2021
wrote and published two new posts in 2021
kept CV and events list updated
Commission scrolls for the three awards for which I did not receive scrolls
commission request sent
Complete five UFOs (unfinished objects)
completed one UFO – a sideless surcoat
For Others
Finish and gift Master Grimm’s Pelican cloak (write corresponding blog post)
progress on the cloak was made
additional details are being added as Master Grimm was awarded his Laurel in October 2021
Organize and support Pennsic Newcomer Activities as applicable (TBD due to COVID)
Pennsic was cancelled again in 2021
Continue with efforts as Kingdom Chatelain
done!
For Fun
Attempt brewing again
nope
Practice calligraphy – maybe even make a scroll!
nope
Attempt silk banner painting again
nope
I clearly wasn’t interested in doing anything for fun in 2021 😅
Now for the projects that I have lined up for 2022 (with some carry-over from 2021):
Finish and gift Master Grimm’s Pelican/Laurel cloak (write corresponding blog post)
Organize and support Pennsic Newcomer Activities
Continue with efforts as Kingdom Chatelain
Fulfill my role as Head Chamberlain for the reign of Cuan IX/Adelhait III
While there isn’t much on this list that usually falls in to the categories “for me” or “for fun”, I’ve realized that with the ongoing pandemic I am stretched relatively thin. Completing or progressing on the projects that I already have in motion is much more manageable than attempting to take on anything new. It’s a rather sad admission, but I remain hopeful that I can find fun and creative outlets when I have more bandwidth in the future.
I’m also eager to get back to attending SCA events regularly as a Peer. In some ways, because of the pandemic, my Peerage still doesn’t feel real to me yet. Once things are more “normal” again, how will being a Peer change my SCA experiences? Will events feel different now? Will expectations or responsibilities be different? Will my interactions with other SCAdians be different? I know what other Peers may say. I also know that it’s not the same for everyone. I want to be able to discover the answers to these questions myself. I’m hoping this year I can do that.
Five months ago I was recognized by Their Majesties of Atlantia, Anton & Luned, and the Order of the Pelican at Virtual Ymir: the Giant Sleeps. Despite almost half a year having passed, it still hasn’t quite sunk in that I am now a Peer of the Society; that all of my hard work over the years has been recognized.
The Pelican pin gifted me by my Grand Peer, Dame Rosalind Delamere, and her husband, Master Gaston Valmont.
From March 2020 – June 2021 the SCA existed in a restricted virtual environment due to COVID-19. Because of this, both my vigil and elevation took place online. It was very odd to experience this significant event that I had worked towards for years in quite limited company. Friends that I had imagined being present were unable to be there. People with whom I very much wanted to speak were not available. What should have been a momentous occasion in any SCAdian’s life turned out to be not only atypical but even a bit sad. And so, the recognition that I received seemed to happen almost within a vacuum.
Despite these unique circumstances, my Peer – Duchess Adelhait Fuchs – was able to fulfill almost every item on my “elevation wish list” and to provide me with an experience that was as close to what I wanted as possible given the nature of the event. For her time and efforts in this endeavor I will always remain truly grateful and forever feel fortunate to have been her student. And so while my vigil and elevation may not have been as I originally imagined, they were still fulfilling and special in their own ways.
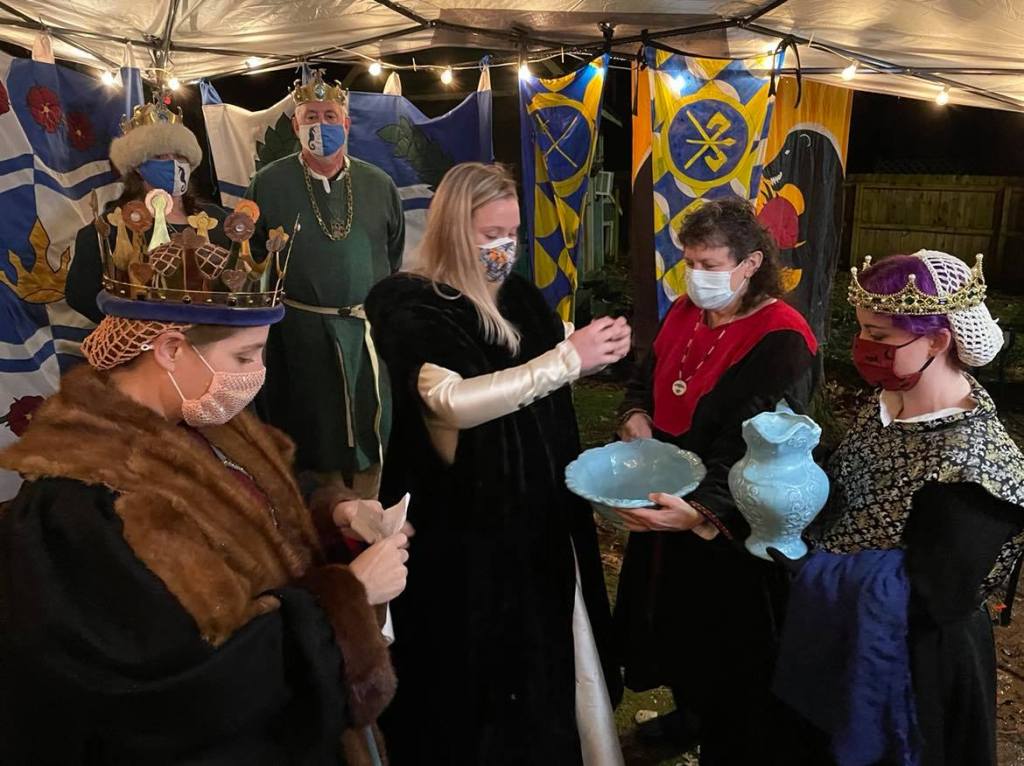
For those who may be unfamiliar with SCA vigils and elevation ceremonies, the vigilant typically receives a number of gifts (often including regalia) to recognize the achievement of a new award and/or rank. I was incredibly humbled by the gifts that I received this day and will never have the words to express how much I appreciate the time and labor these amazing artists spent in making the regalia that I will cherish for the rest of my life.
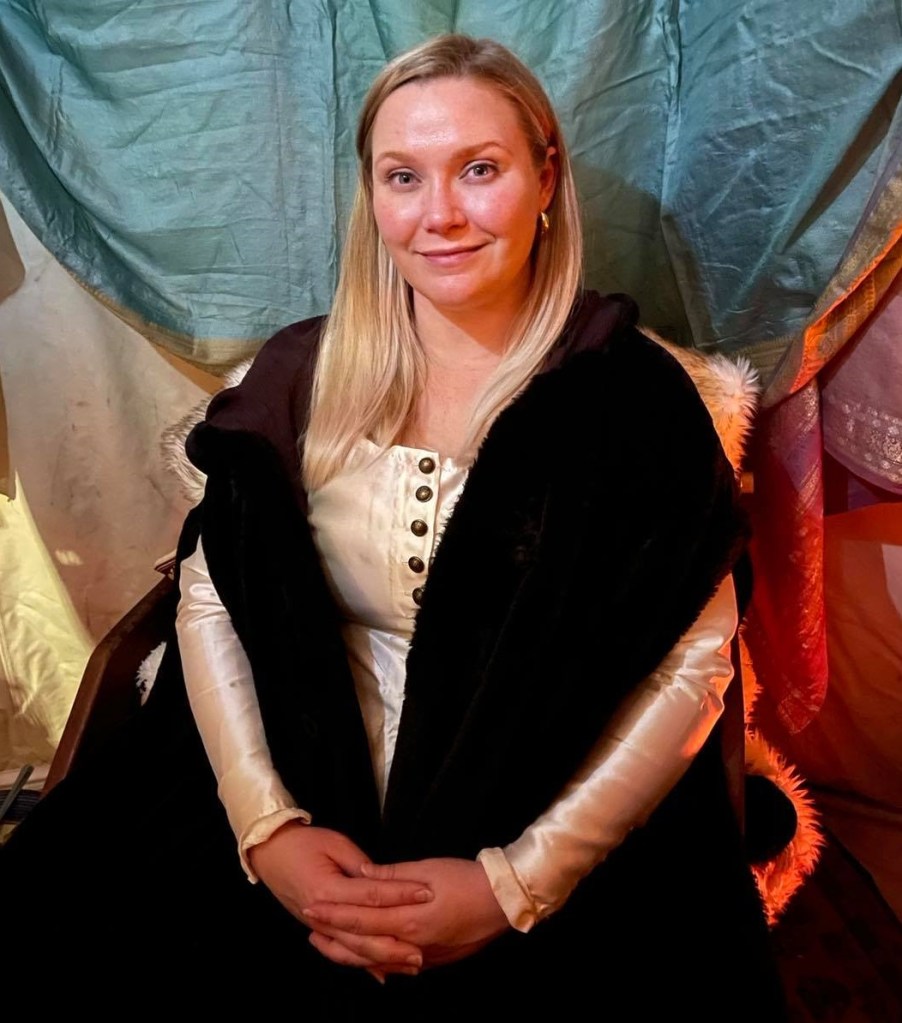
For my vigil, I received a beautiful white dress in silk to wear as I contemplated joining the Order of the Pelican.
Mistress Clare de Crecy made my vigil dress in a gorgeous white silk, provided by my Peer, Duchess Adelhait Fuchs. Her Grace helped to dress me in this beautiful garment while my vigil was prepared.
Vadoma made the towel intended for my hand washing ceremony, while Lady Esa inghean Donnchaidh composed a beautiful text that was read by Her Grace.
Before being placed on my vigil, I had the privilege of hearing the words of a very dear friend, who wrote the following as a part of my hand washing ceremony:
“As you prepare to undertake this vigil in preparation for your elevation, let this water purify your hands and your heart while you consider. Let it not wash away the past, but rather, infuse the present with clarity.
Hear the words of your friends, your peers, and your Crown, and heed well their advice.
Remember that you are both being recognized for your service and also being asked to take up a new burden, one that carries the weight of many expections. Through meditative reflection during this night, may you find a contentment of spirit, a deepened self awareness, and steadfast confidence in your worthiness. Because you are worthy, my dear friend, and you are so very loved.”
The hand washing ceremony is performed prior to the vigil and symbolizes the start of a new journey as a Peer.
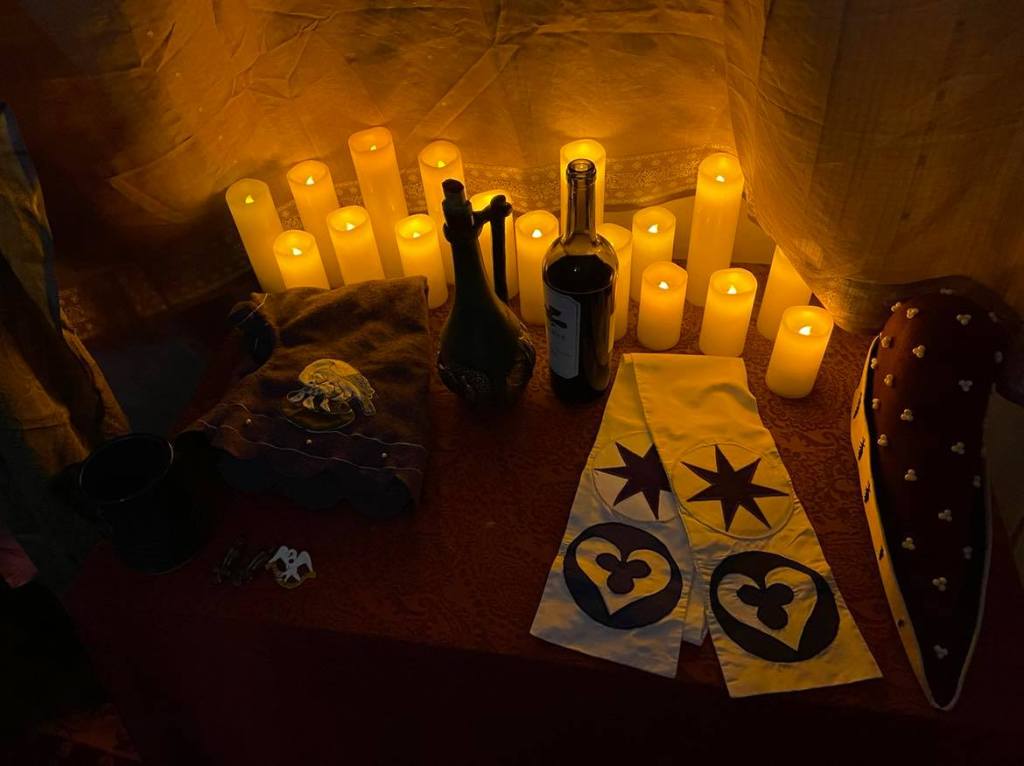
Sitting vigil while speaking to friends via Zoom.
The inside of my vigil tent. Beverages included!
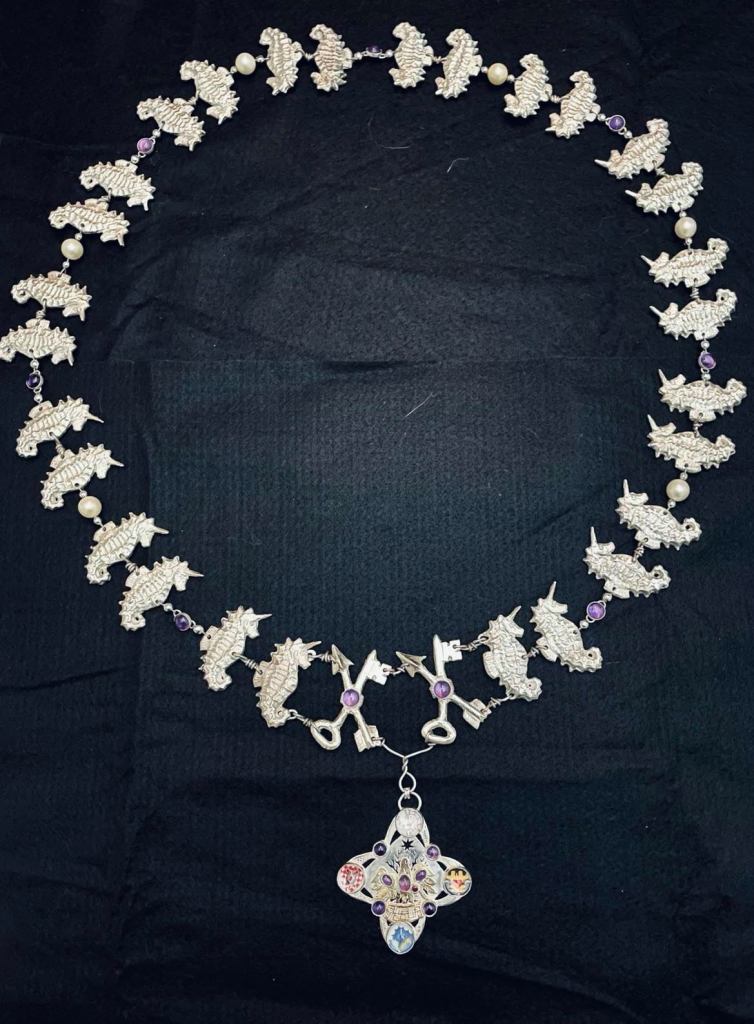
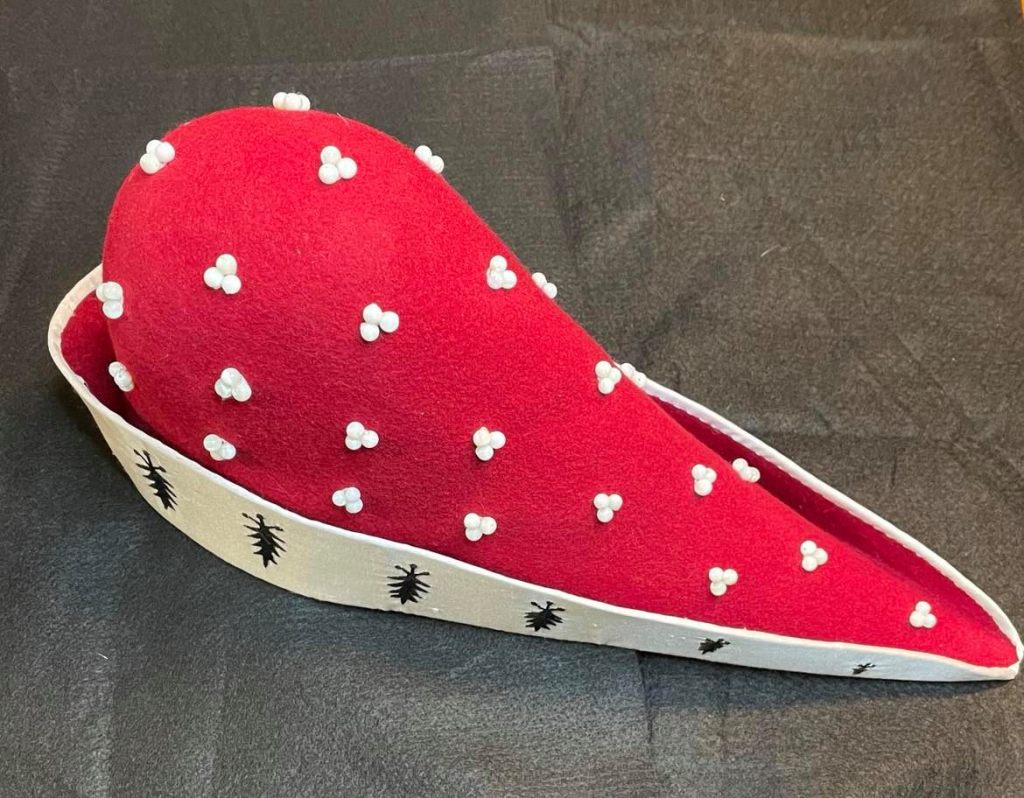
I also received an amazing scroll in recognition of my achievement, and several items of regalia: a medallion and chain of state, a hood, and a cap of maintenance.
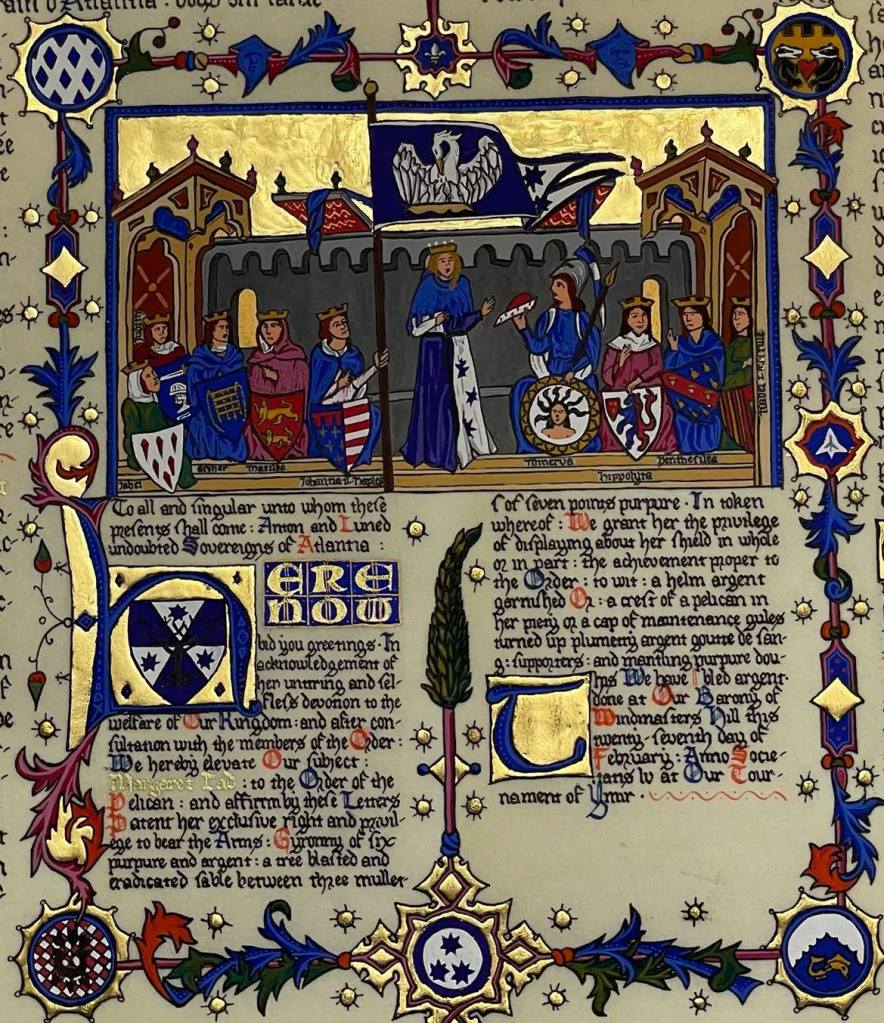
Lady Johanna le Paumer created both the calligraphy and illumination for my scroll. I’ve included a detailed description of the artwork and additional pictures at the bottom of this post.
Master Stephan Grimm made this amazing, custom medallion.
My Grand Peer, Dame Rosalind Delamere, sewed a hood in my heraldic colors and Mistress Hildegard Bergerin completed the embroidered Pelican.
Lord Cataldo Querini cast a chain of state in silver to accompany the medallion made by Master Grimm.
Lord Cataldo Querini also commissioned a Cap of Mantainence by Sartoria MonRo, an Italian maker of reenactment goods. Master Gaston Valmont generously offered his words on the history and meaning behind the cap as it was presented to me.
In addition to the gifts that I received, I was also honored by those worthies who spoke on my behalf as a part of my elevation ceremony: Duke Christoph Krieger from the Order of the Chivalry, Duchess Adelhait Fuchs from the Order of the Rose, Dame Rosalind Delamere from the Order of the Laurel, Master Stephan Grimm from the Order of the Pelican, and Master Raphael de la Rosa from the Order of Defense.
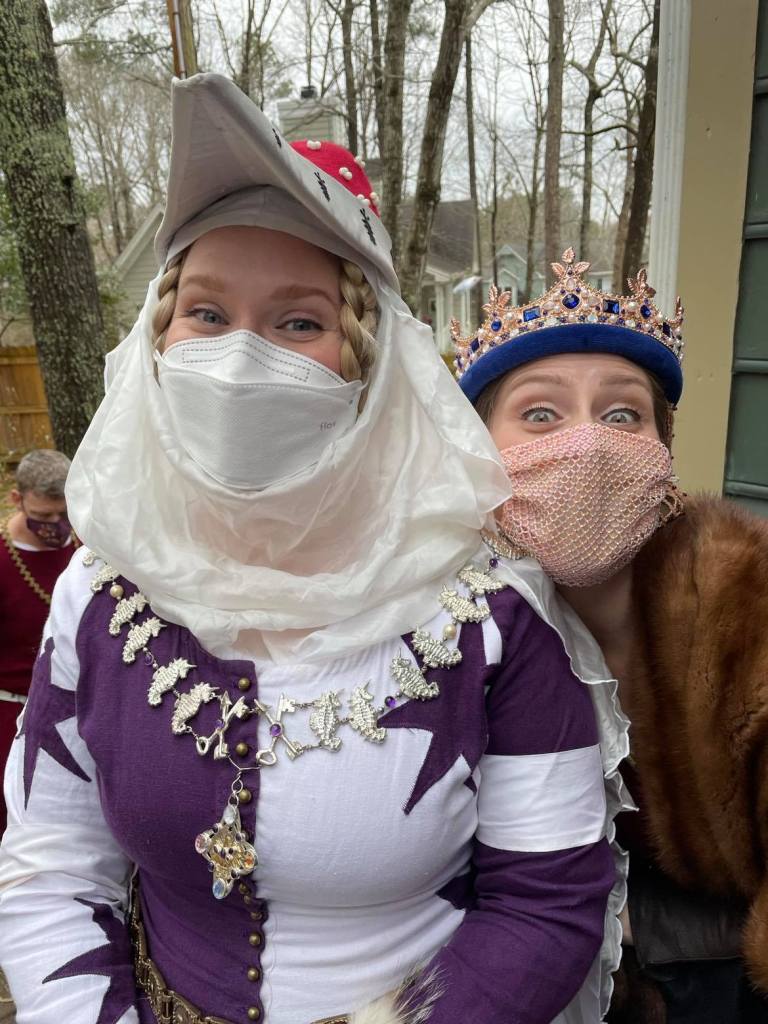
A masked selfie with my Peer, Her Grace Adelhait, right before my elevation in Royal Court.
After having months to reflect on this experience, I can now say that it truly served as a reminder of the greatness of the community within the SCA. And while this achievement was granted in recognition of my work, none of that would have been possible without the friendship and unwavering support of many other people over the years.
Without friends this game is simply not worth playing.
It is for them that I will endeavor each day to live up to the expectations and responsibilities that have been placed before me, by Their Majesties, and by the Order of the Pelican.
My Peerage Scroll
Calligraphy and Illumination by Lady Johanna le Paumer .
The Nine Worthies (originally depicted as men) were nine historical, scriptural, and legendary personages who personify the ideals of chivalry established in the Middle Ages, whose lives were deemed a valuable study for aspirants to chivalric status. It was a set list, featuring three Christian leaders, three Hebrew leaders, and three pagan leaders.
At some point in the 14th century, writers began to put together women counterparts. Originally, the Nine were all depicted as Amazon warriors, but over time the Lady Worthies also grouped into three Christian leaders, three Hebrew leaders, and three Pagans. The list wasn’t always set; the cast rotated depending on who was writing the text.
A close up of the scroll.A close up of the nine worthies.
From left to right;
Judith, who decapitated Holofernes (his head is displayed on her arms), the leader of an Assyrian army that occupied Israel.
Jahel, who killed the commander of an enemy Canaanite army by hammering a tent peg (of which six are displayed on her arms) into his temple.
Esther, who saved the Jewish people in exile from a plot to destroy them.
Empress Matilda, (1102 – 1167), daughter of King Henry I, who initiated a war against her cousin, Stephen of Blois, after he usurped the throne.
Johanna II, (1371 – 1435), Queen of Naples, who managed to re-establish herself as Queen after she had been imprisoned by her husband, James of Bourbon.
Minerva, Roman equivalent to Athena, goddess of wisdom and strategic warfare, patron of craftsmen, who carries the Aegis.
Hippolyta, queen of the Amazons.
Penthesilea, an Amazon warrior who came to the aid of Hector at the siege of Troy.
Isabel of Castile, [also known as Elizabeth I of Spain] (1451 – 1504), under whose rule Spain was united and the Emirate of Granada was conquered.
And, of course, the figure in the center is me – wearing my heraldic colors (purple and white) and badge (seven pointed star), with my Baronial coronet, a Pelican banner, and a cap of maintenance.
As is the tradition of most humans, in January of 2020 I wrote out a list of goals for the year. I organized that list into four categories that were important to me at the time: personal, financial, health, and SCA. There was only one goal listed under the category of SCA: Take a break!
Pause for laughter.
Of course, I wrote that goal after the end of 2019 – the year in which I spent 75 of 365 days of the year either at an SCA event or travelling to/from an SCA event. Yes. Twenty percent of my year was spent outside of my home just attending SCA events… That’s not including the time spent at meetings and practices during the week. Or the time spent online during the day helping to coordinate a Royal Reign, or keep up with my duties as a Regional Officer, or organize my classes and volunteers as a member of Pennsic Staff. To call 2019 a busy year would be a bit of an understatement.
So yeah, I needed a break. And thanks to COVID-19, I certainly got one!
From the beginning of March through September of 2020, I didn’t do much. Events were cancelled and everyone in the SCA was struggling to adapt to a virtual environment. Fortunately, the Kingdom of Atlantia responded and evolved quickly. By the end of March, the Virtual Atlantia initiative had hit the ground running. Since then, there has been a plethora of online meetings, classes, events, and other gatherings available on a near daily basis.
Some members of the populace were able to jump into this new virtual SCA with both feet. Others needed a bit of time to adapt. I fell into the latter category since I was initially more preoccupied with a number of other changes that had taken place due to COVID. I transitioned to a full-time remote employee due to office closures and subsequently moved to a new area of Virginia (and a new local SCA group).
But by June I was getting back into the swing of SCA things, hosting a Regional Chatelains’ meeting for my local officers and attending the Summer session of the University of Atlantia. I was also getting ready to submit my letter of intent to serve as Kingdom Chatelain – a goal that I had been working toward for three years.
Happily, my letter of intent was accepted and I stepped up as a Kingdom Officer on September 19th. My break was over!
Testing out the camera prior to taking my virtual oath of fealty to the Crown as a Kingdom Officer.
Since September I’ve been finding my footing as a Great Officer of State (GOofS as they are called in the Atlantia) and as the Kingdom Chatelain. I meet with the other GOofS every two weeks, with my local Chatelains and Deputies once a month, and submit reports on a quarterly basis – all virtually, of course. I am fortunate to be able to work with an outstanding group of people who are all committed to keeping the populace engaged during this time when events cannot take place.
Goals for 2021
Now that I’m in my fourth month as Kingdom Chatelain and feeling more comfortable in this role, I’ve taken some time to write down my goals for the year of 2021.
I’ve decided to organize my goals in a similar way to how I organized my goals for 2019. Those goals were organized into three categories: For Myself, For Others, and New to Me. My goals for 2021 will be organized into three categories as well: For Me, For Others, and For Fun.
For Me
Update blog with posts about projects and events from 2019-2021
Commission scrolls for the three awards for which I did not receive scrolls
Complete five UFOs (unfinished objects)
For Others
Finish and gift Master Grimm’s Pelican cloak (write corresponding blog post)
Organize and support Pennsic Newcomer Activities as applicable (TBD due to COVID)
Continue with efforts as Kingdom Chatelain
For Fun
Attempt brewing again
Practice calligraphy – maybe even make a scroll!
Attempt silk banner painting again
When I organized my goals similarly in 2019, I was successful in completing everything in the category For Others. I was not so successful in the other categories. However, I think that due to the current hold on events through (at least) May 31, 2021, I will have more time to achieve the balance I am seeking.


