For the Dirty Dozen Largesse competition for King’s Assessment I’ve decided to try my hand at sand casting pewter. Luckily for me, my husband, Baron Cataldo Querini, has been casting for years and was able to provide all of the tools, material, and knowledge that I would need in order to try this -new to me- art.
The parameters of the competition stated that all entries would be donated to the Kingdom. With this in mind, I reached out to Mistress Asta Knarrarbringa, Their Majesties of Atlantia’s Royal Secretary, to ask if there were any award medallions needed. She let me know that they were running low on Golden Dolphin medallions and so I decided that making a dozen for donation would be helpful.
The first step of sand casting is to design a master. The master will then be used for each cast to create the product; the product in this case being twelve Golden Dolphin medallions. Originally, my husband and I started working on a design to 3D print and use as the master. But then I remembered that I already had a Golden Dolphin medallion cast in brass that we could use. Using a pre-existing medallion saved us a lot of time!

This Golden Dolphin medallion is a lineage medallion that was originally purchased for Baron Christophe of Grey, then passed to Mistress Lorelei Greenleafe, then passed to Master Stephan Grimm, and then passed to myself. It does include a maker’s mark on the back – a petaled flower – but, despite searching, I could not find the original maker (if someone knows, please tell me so that I can give appropriate credit!). Regardless, I thought that using this medallion as a master would be a way to honor those who have held it in their possession before it came to me.
After deciding on the above, I set to work casting the medallions. The first thing I did was to light the burner to start the process of melting the pewter. Pewter melts at around 338° F depending on the mixture of metals within the pewter, which is a combination of tin and other metals.

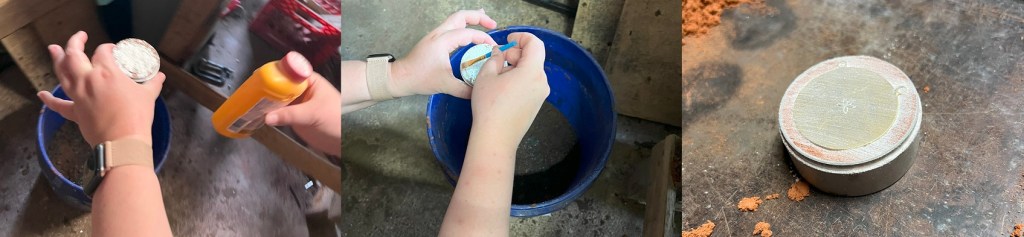
While the pewter was melting I started to pack the sand into aluminum ring molds. For this specific set of molds, the sand is packed first into the smaller ring and tamped down with a hammer, which will be the bottom ring during the pour.

After packing the sand into the bottom ring, I pressed the master – face down – into the sand. The master needs to be centered and pressed down so that half is embedded and half is still raised.

After pressing the master into the sand, I dusted it with a talcum-based powder. The talcum acts as a release to prevent the sand that is packed into the bottom ring from sticking to the sand that will be packed into the top ring. In this project, I used Gold Bond Body Powder for this purpose.
The next step is to put the molds together and fill the other half with sand. The molds need to line up according to the index line (pictured below) and the top half packed the same way the bottom half was packed.

After packing the top ring with sand I separate the rings again and created a channel for the pewter in the top ring. The channel was created using a finishing nail. I lined up the nail to the center of top ring, in the middle of the imprint of the back of the medallion, and then pushed the nail through. The channel was smoothed out on the other side using a scrap piece of metal.

The last step to smoothly out the channel was to gently press on the opening of both sides with my finger. This helped compact any loose grains of sand in order to prevent them from falling into the pour through the channel.
Then it was time to pour! I put on my thick leather gloves and used steel tongs to grasp the cup holding the pewter.
A puddle of pewter formed on top of the sand, which indicated there was enough to fill the mold and the channel. After that I waited about five minutes for the pewter to harden and cool.
After five minutes, I separated the molds and removed the new pewter medallion.

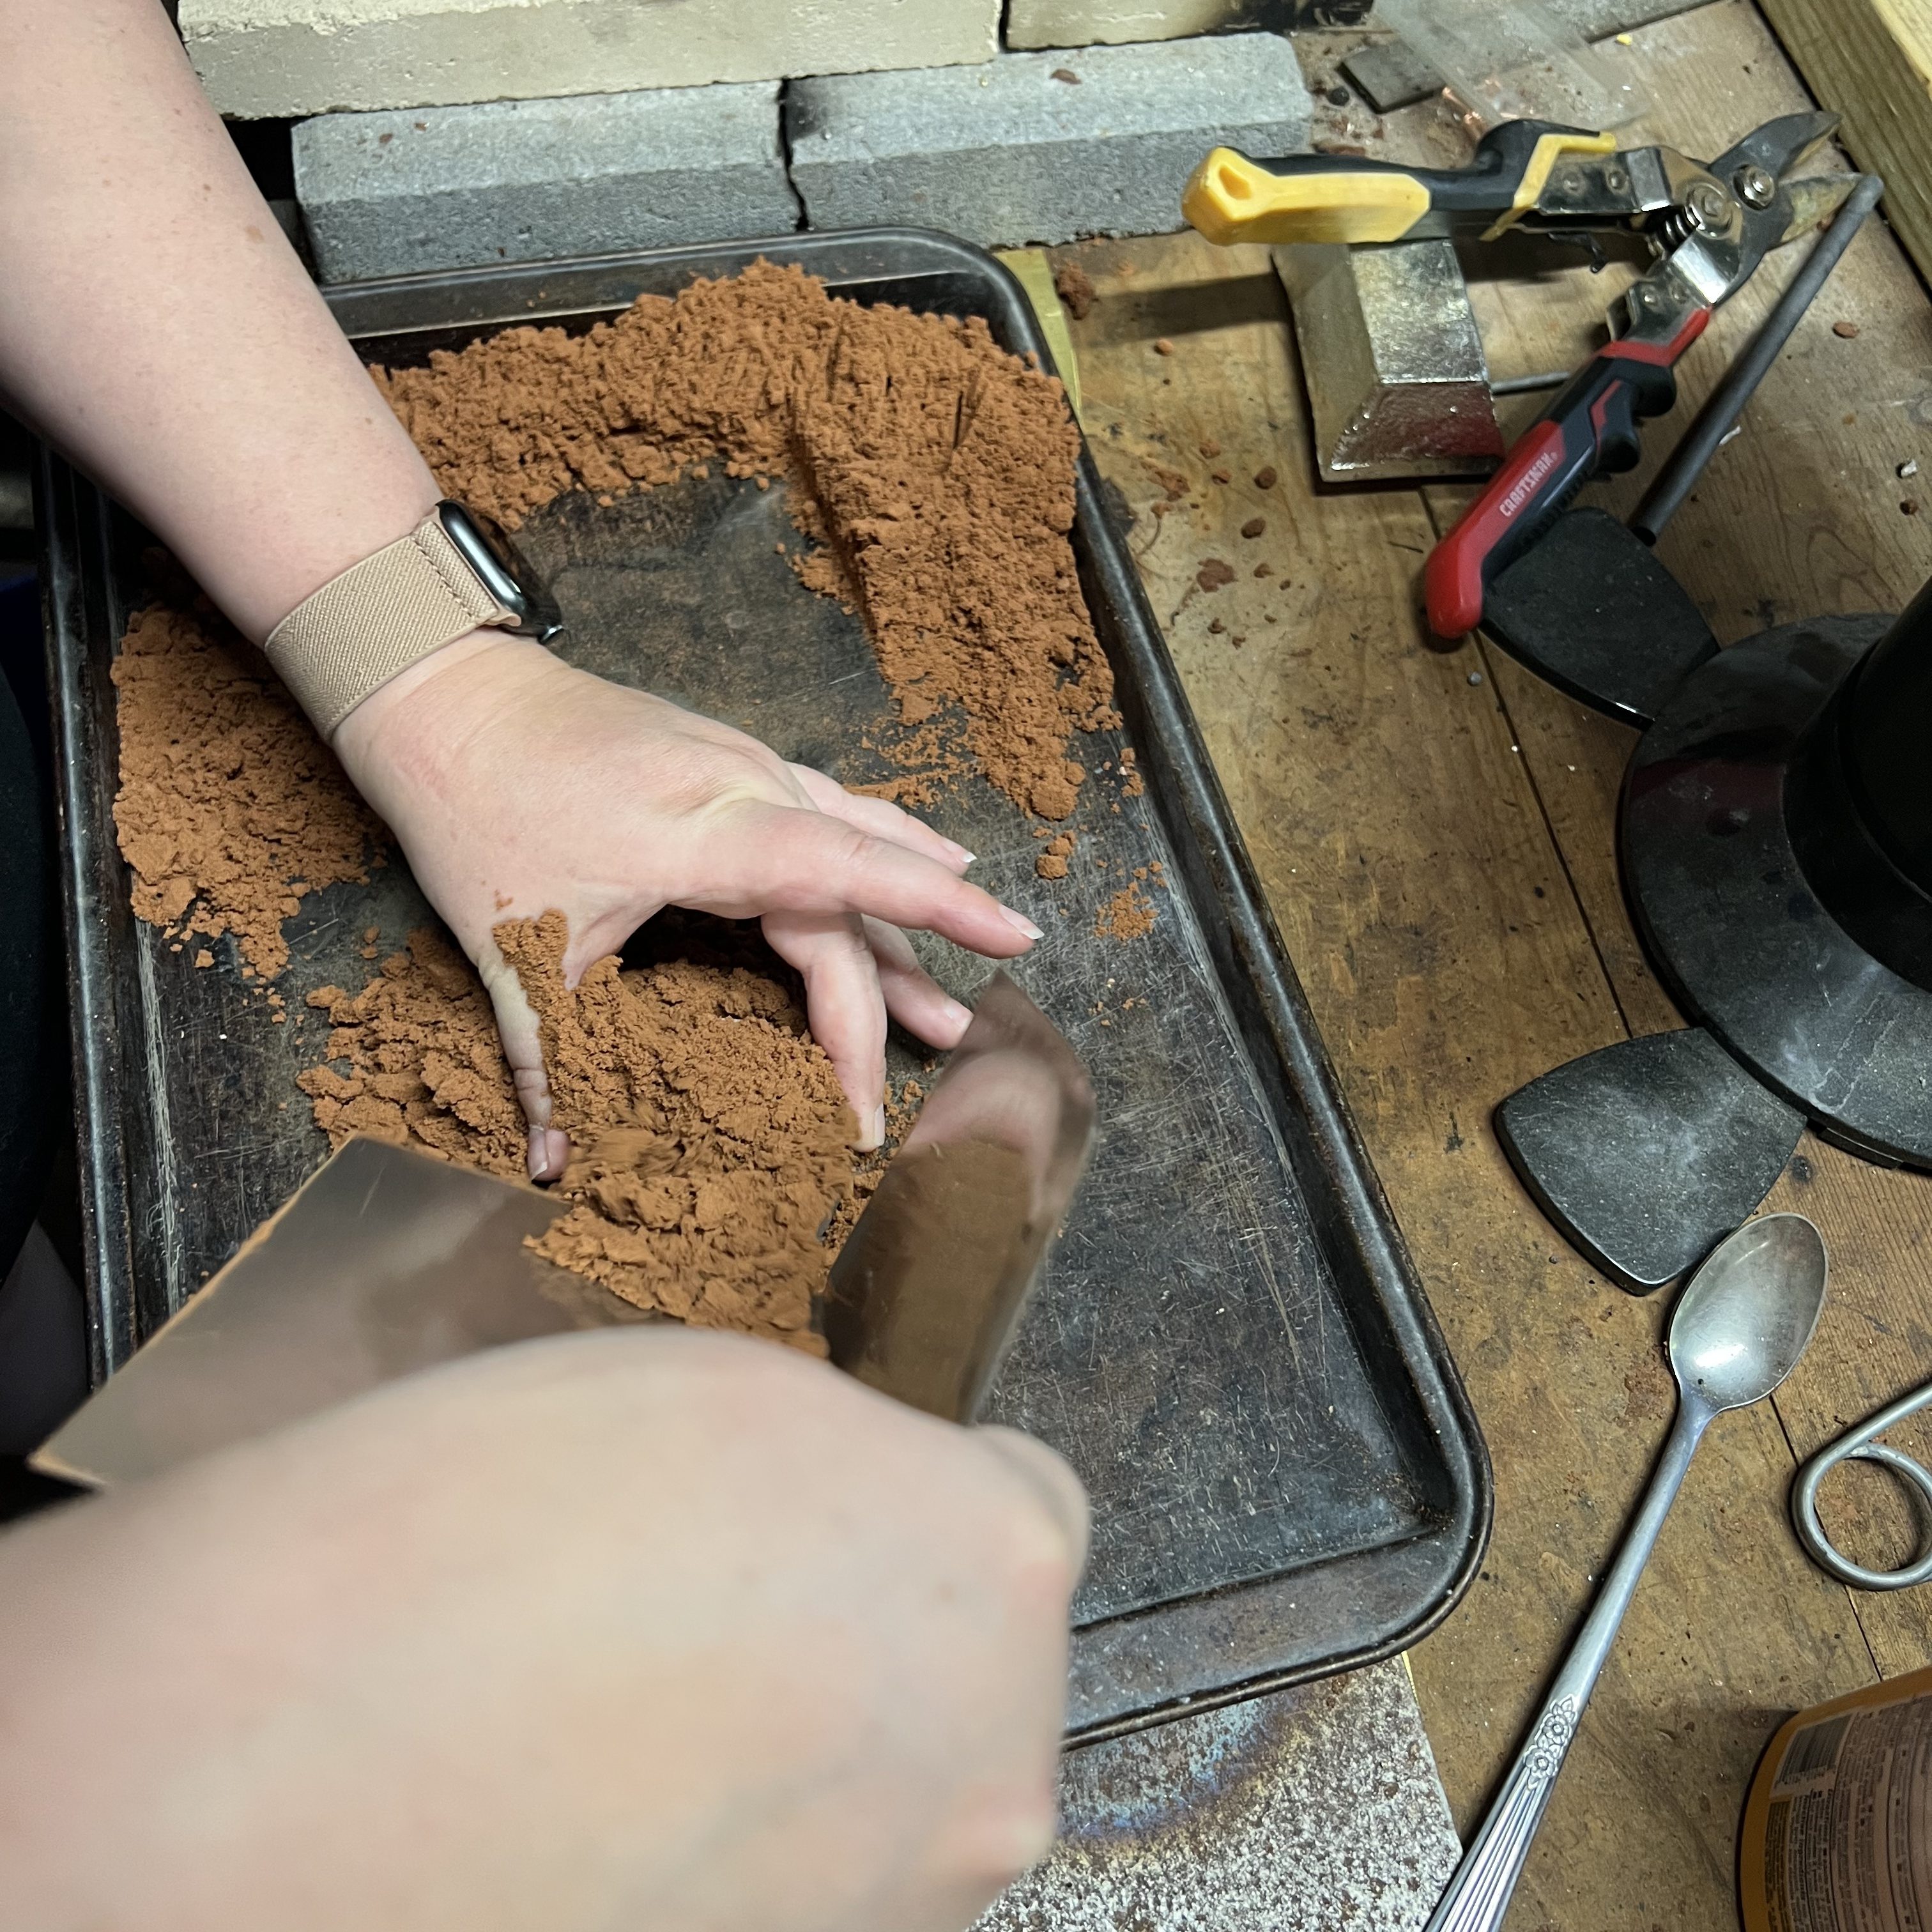
There was still a lot of sand packed around the channel. That was removed with a spoon and then the medallion was clean up with a small paint brush.
The pewter channel and puddle were removed by clipping the pewter as close to the medallion as possible. And, voila!

Now, the repetitive part of casting is having to do this 11 more times! I was able to cast three more medallions before I ran into an issue. While pouring the pewter, the mold started to separate and the pewter leaked out of the side.

At first I thought I had failed to press the molds together properly and there was a gap at the seam. But it happened again, even after I had double and triple checked that the molds were fitted together tightly. My husband theorized that I might be packing the sand too tightly and there was nowhere for the hot air to escape – potentially creating an air bubble that was forcing the molds apart. We tried again, this time creating additional channels outside of the shape of the medallion in the mold and along the edge of the rings. Unfortunately that didn’t work either and it happened for a third time!
The fourth time my husband tried it for himself and it still failed. At that point we decided to take a break because we were getting frustrated. Later in the evening my husband tried a few more times and the cast failed each time. We decided that the molds themselves might be weaking from age and use (they have been in use for a few years) so we placed an order for a new set.
So for now I have four finished medallions and will have to make the last eight when the new molds arrive.
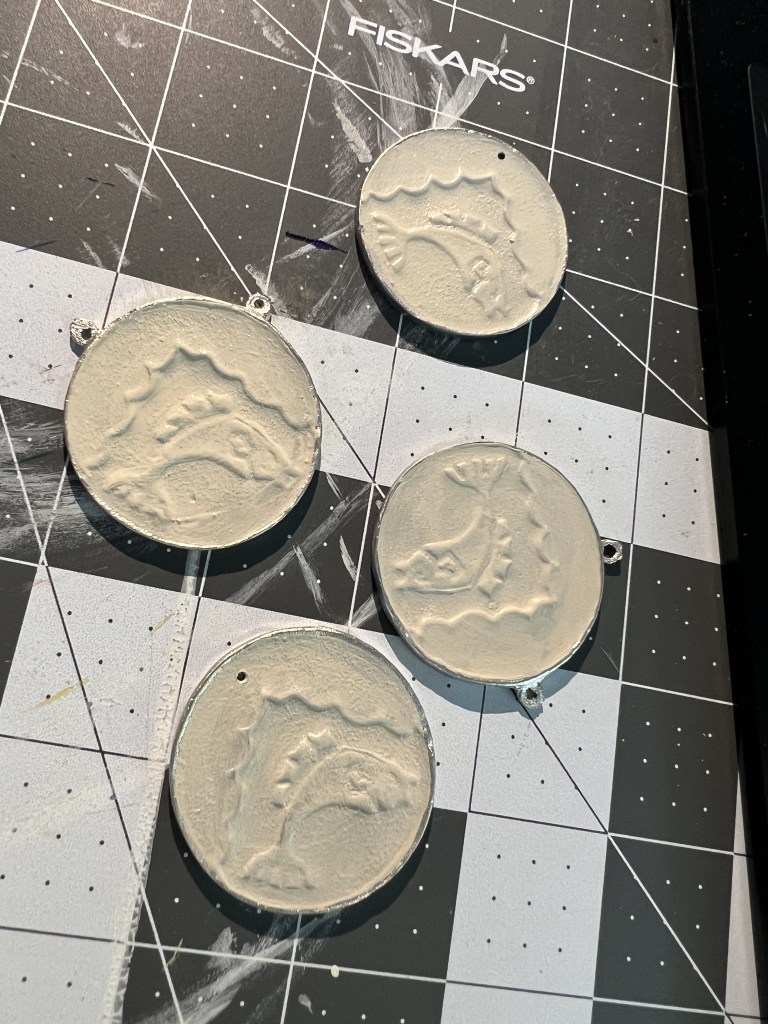
The final step in casting was the medallions to be cleaned and buffed. My husband was kind enough to do this part of the process for me. He used an 80 grit flap-wheel on his bench grinder and a 220 grit wheel on his angle grinder to give the backs a light polish. I’ll learn and use the bench grinder on the next batch. On some of the medallions we decided to drill a hole in the center using a drill press… add that to my list of tools to learn about!

According to Dress Accessories 1150-1450, many lead alloy brooches would have been painted in period (Egan and Pritchard, 1991, pg 261). In keeping with this, I wanted to paint the medallions I had made. I used a variety of brushes in different sizes and model paints for this process.

I started by painted the entire front of the medallions with a base coat in “Wraithbone”.
Next, I painted the white. White is a difficult color to paint due to the size of the pigment. I ended up painting four layers – thinned with water – in order to get the coverage that I wanted.

After the four coats of white, I painted the blue. The coverage of this blue was fantastic. I only needed one coat and then some minor touch ups after drying.
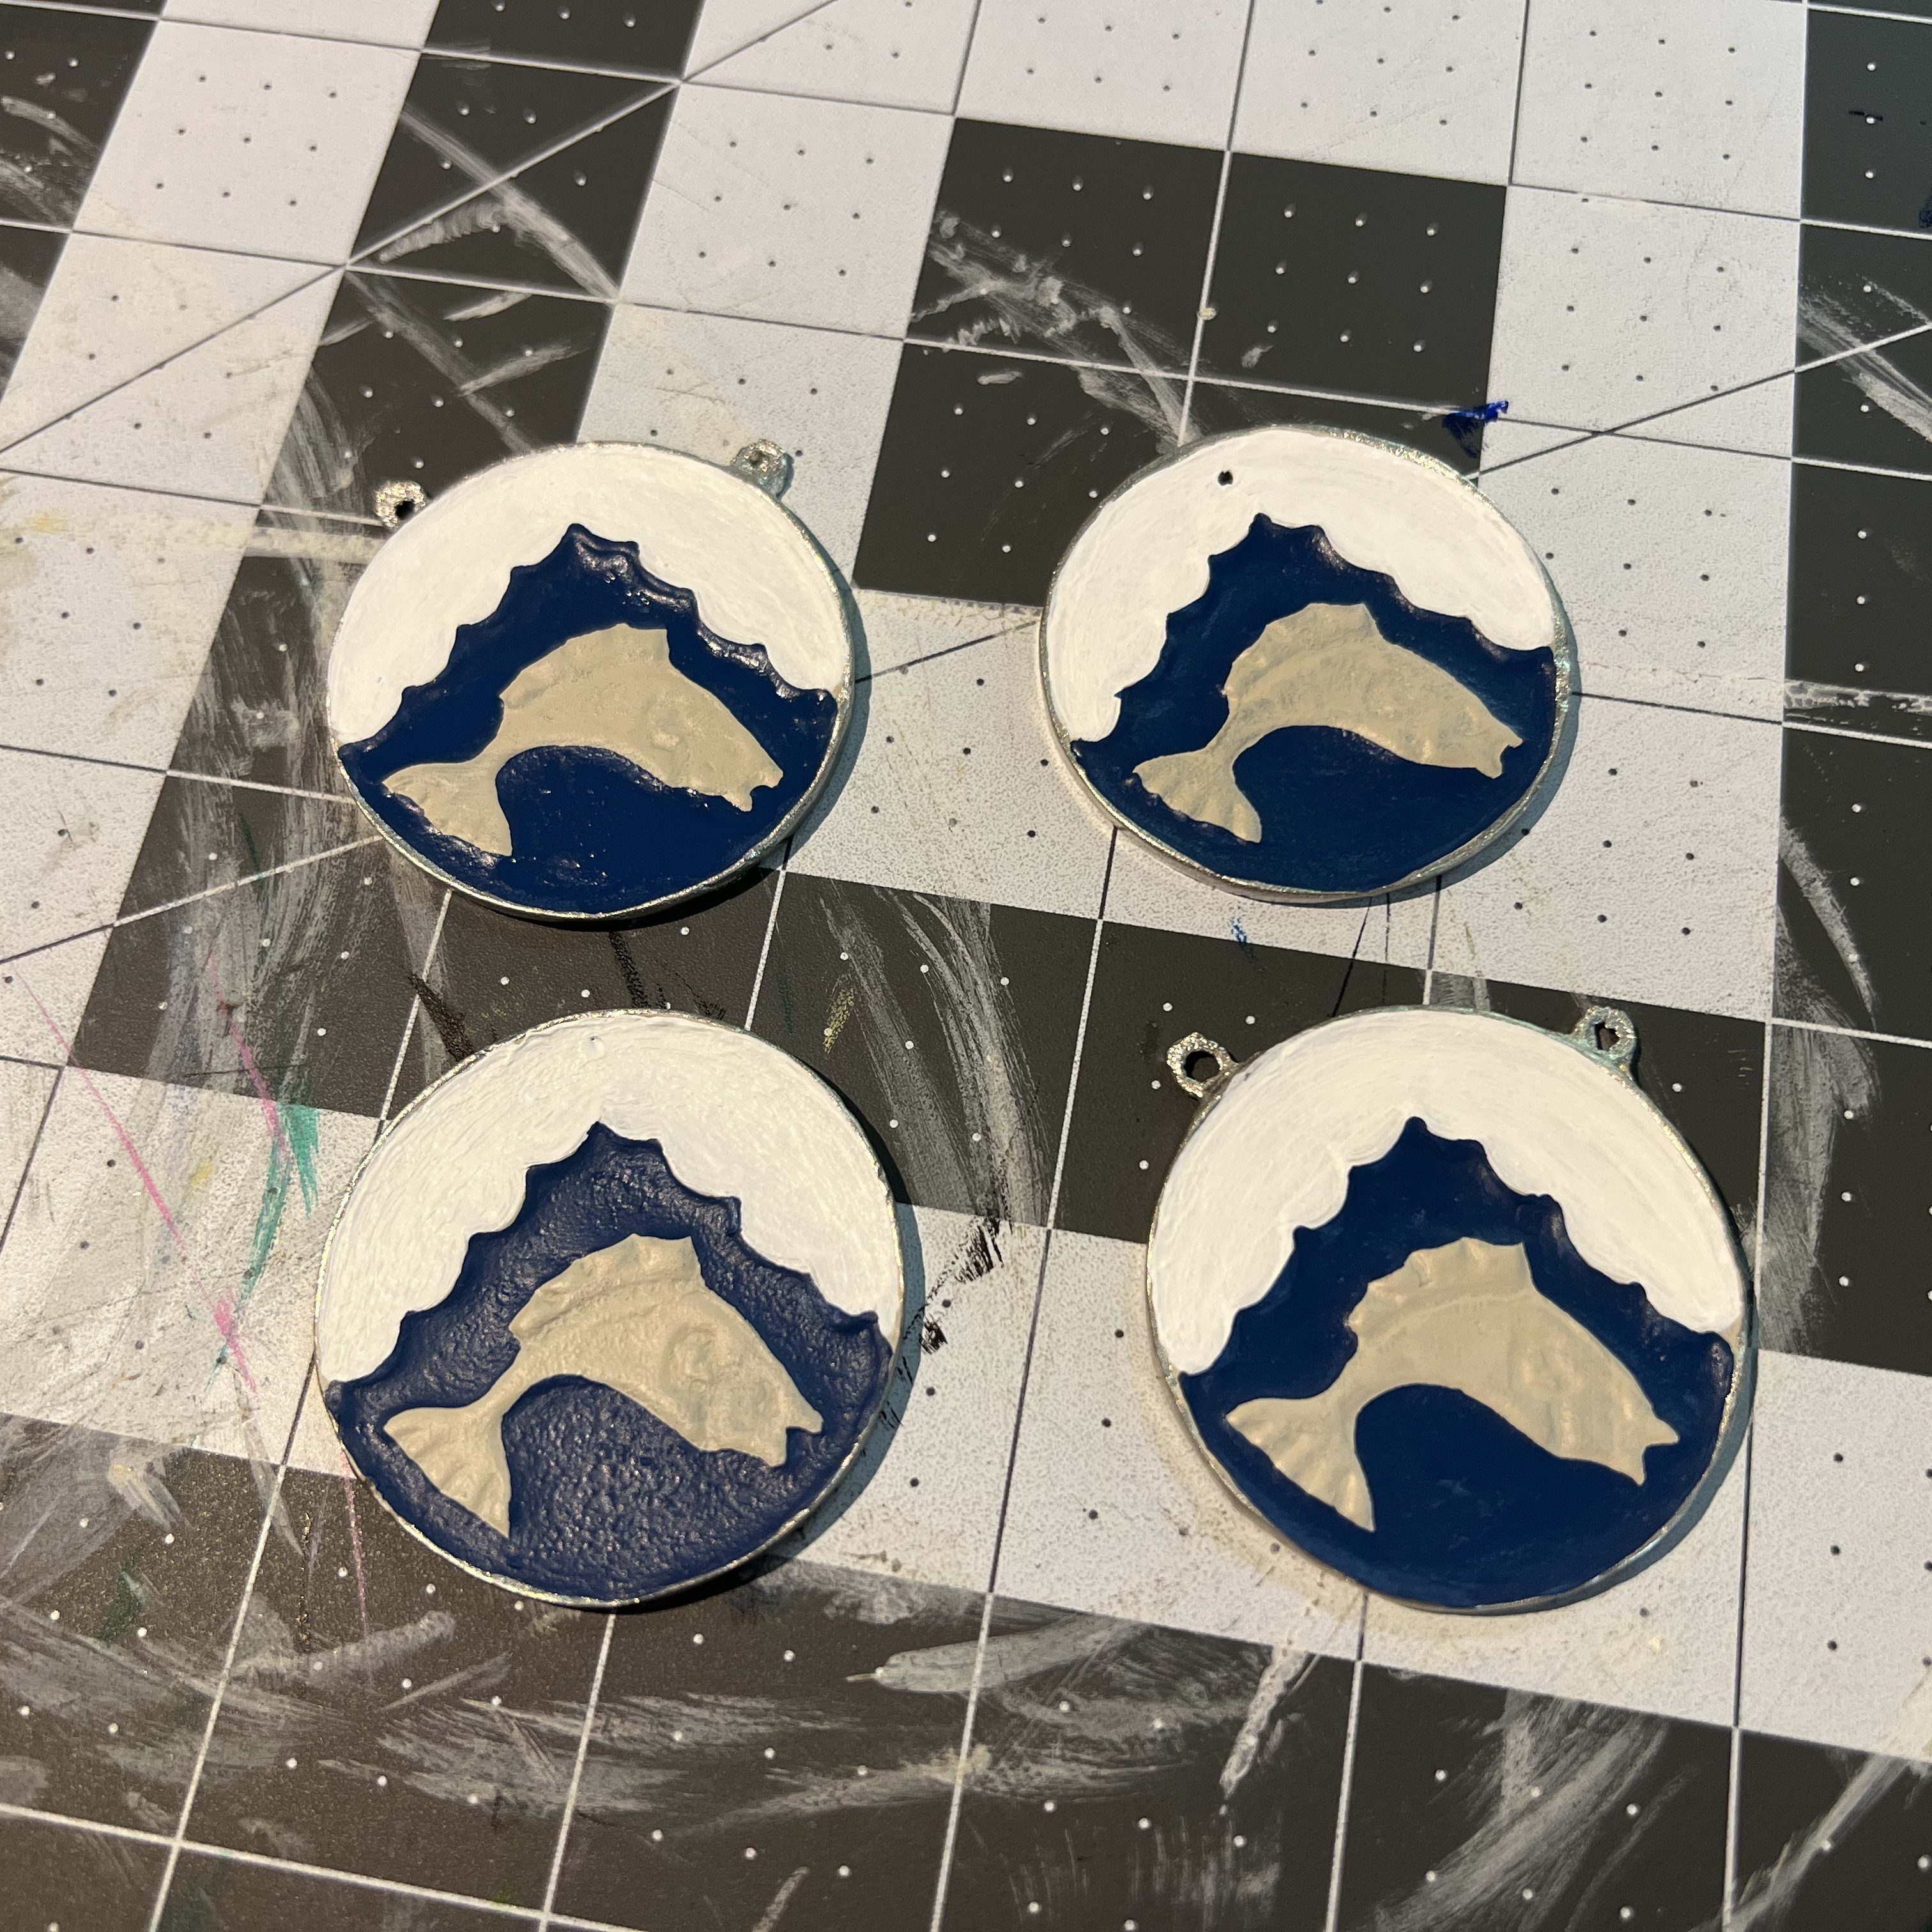
Next I painted the dolphin gold. The gold paint was very thin! I ended up more or less blobbing it on there with the brush rather than paint a million layers and it actually turned out looking very cool.

For the last step of the painting process I went through with a teensy tiny brush and cleaned up the outlines with the blue and added the details to the dolphin.
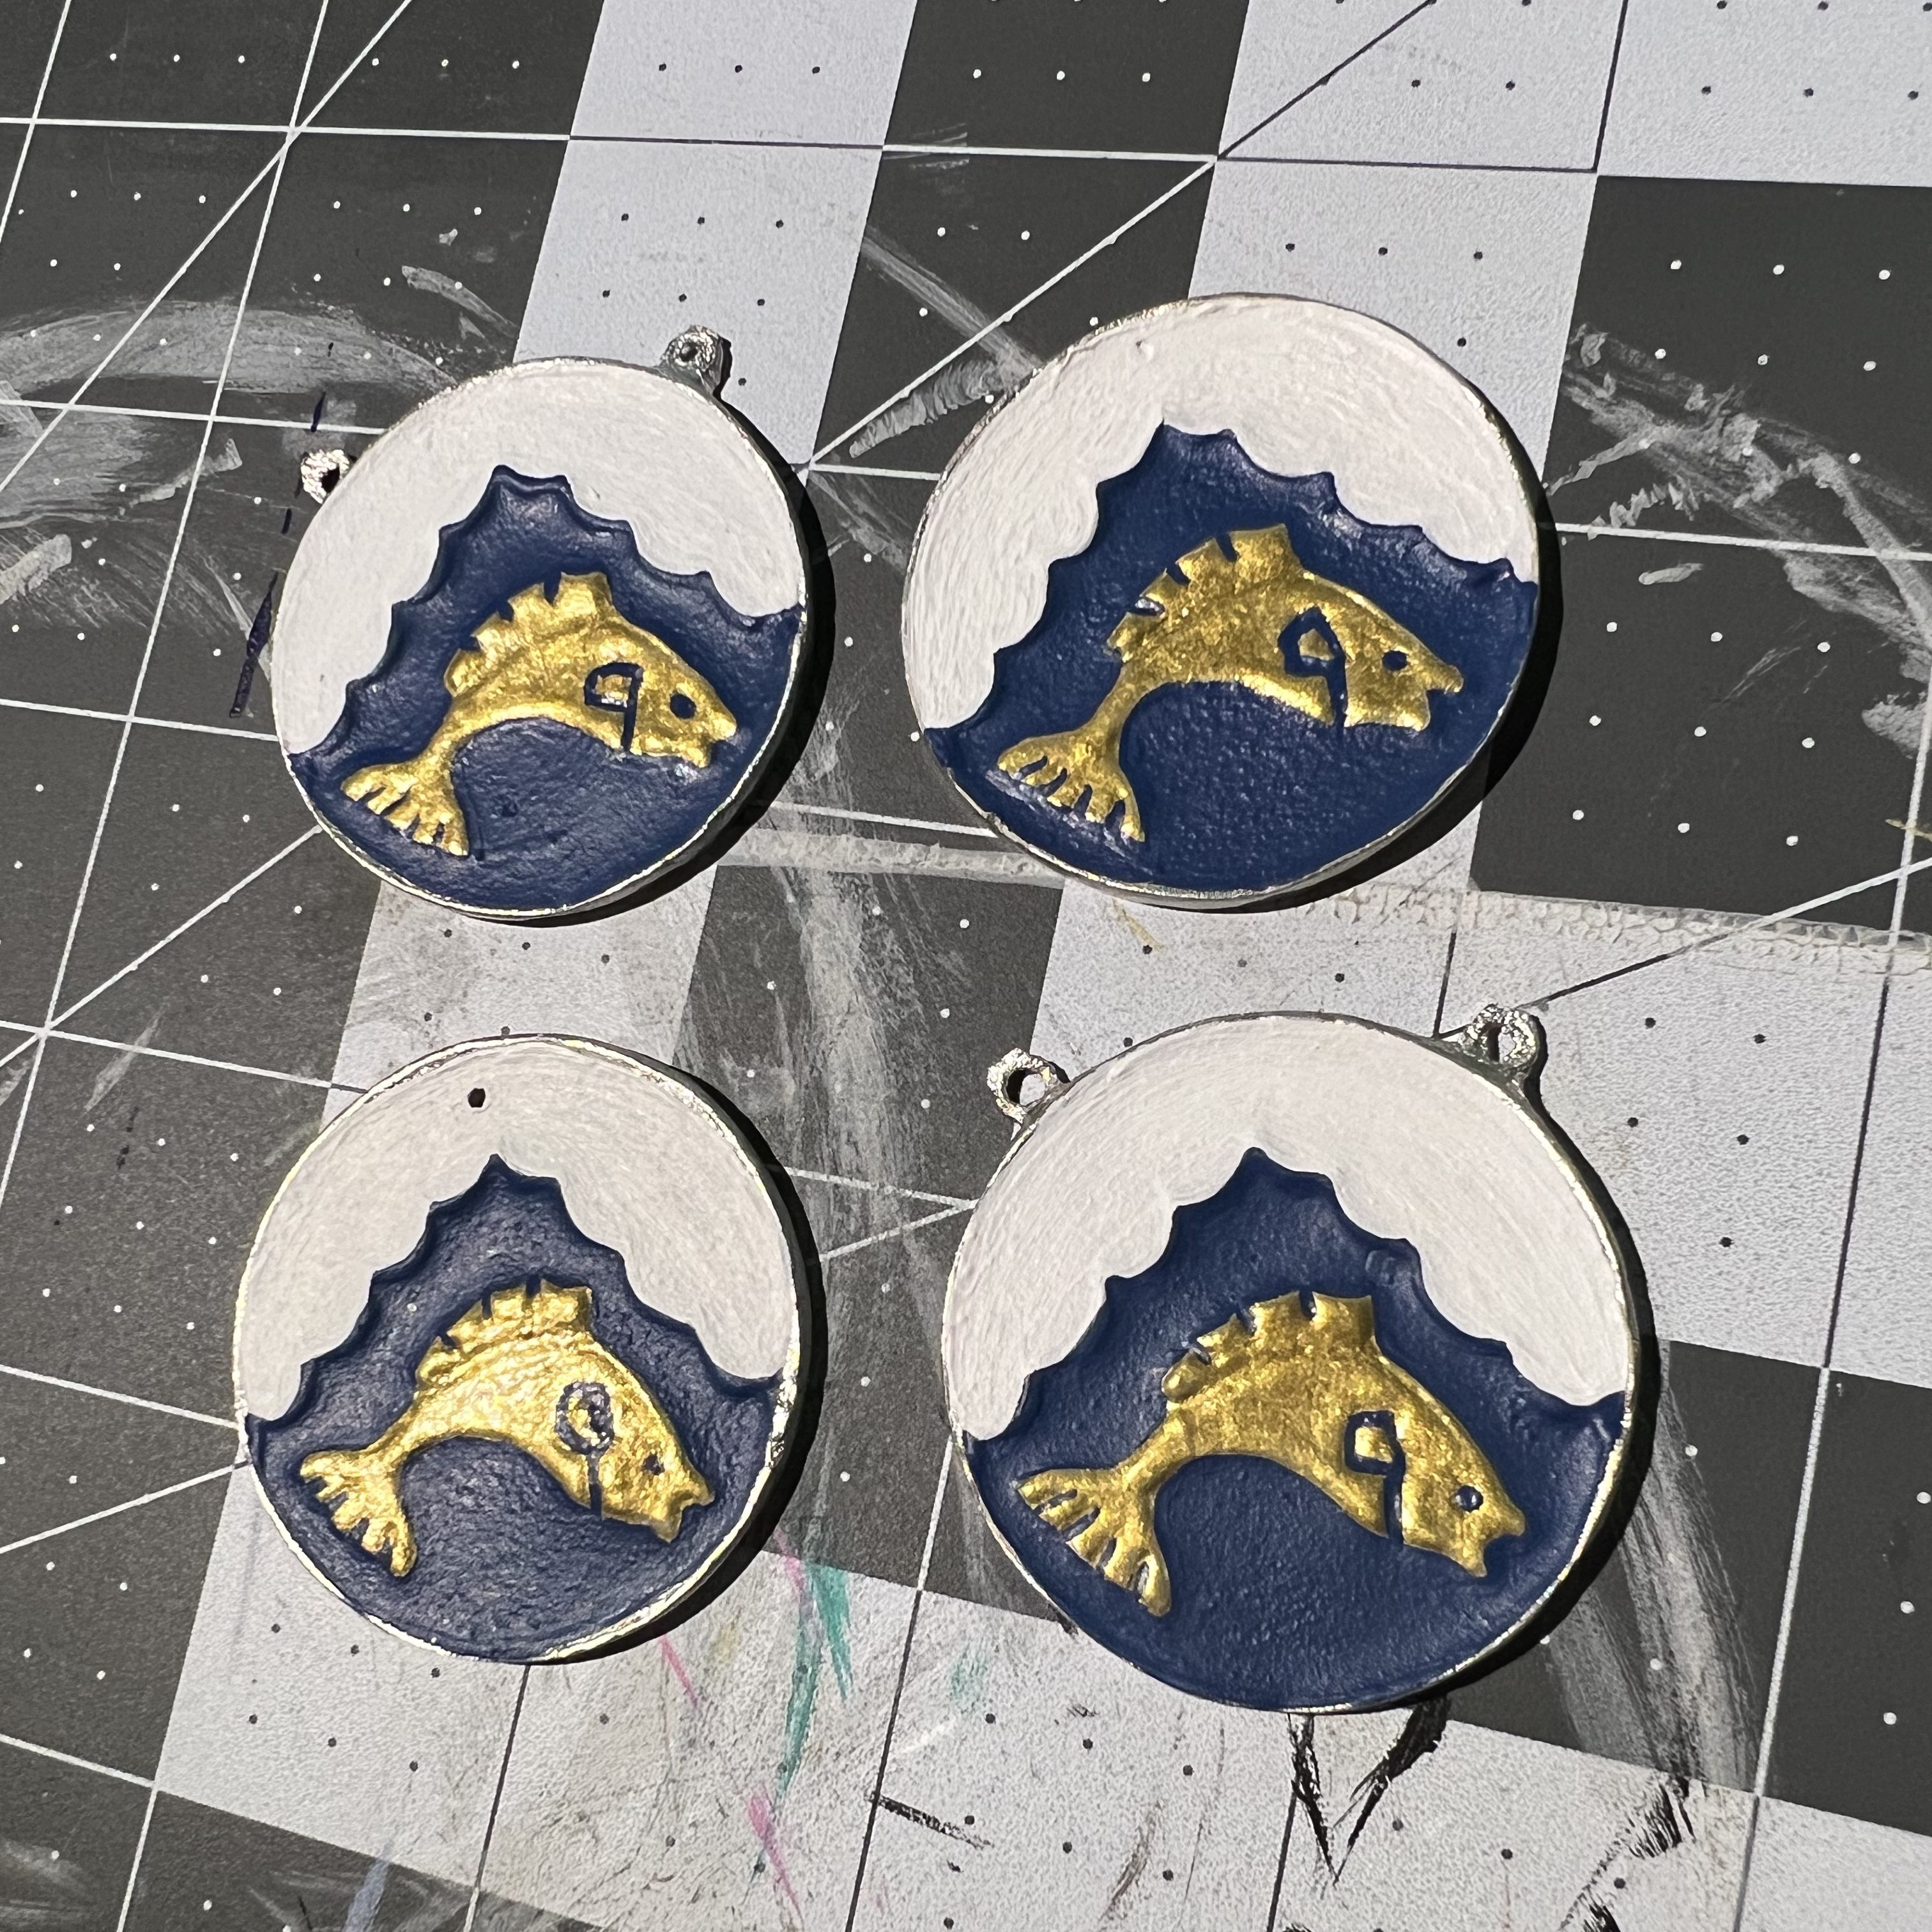
I allowed the paint to dry for over 12 hours. To seal the paint, I sprayed the medallions with a Krylon brand lacquer. This will help prevent the paint from chipping and protect the finish.

The final step of this project will be to affix a jump ring so that a medallion cord can be attached as needed.
I am very pleased with how these medallions turned out! The new ring molds should be delivered in the next two weeks so I can finish the project then. What do you think? Let me know in the comments!
UPDATE: After the new casting rings were delivered I was able to successfully cast the remaining medallions, paint them, and enter them into the Dirty Dozen Largesse competition at King’s Assessment on July 8, 2023. I won!

They look amazing!
LikeLiked by 1 person